Published on
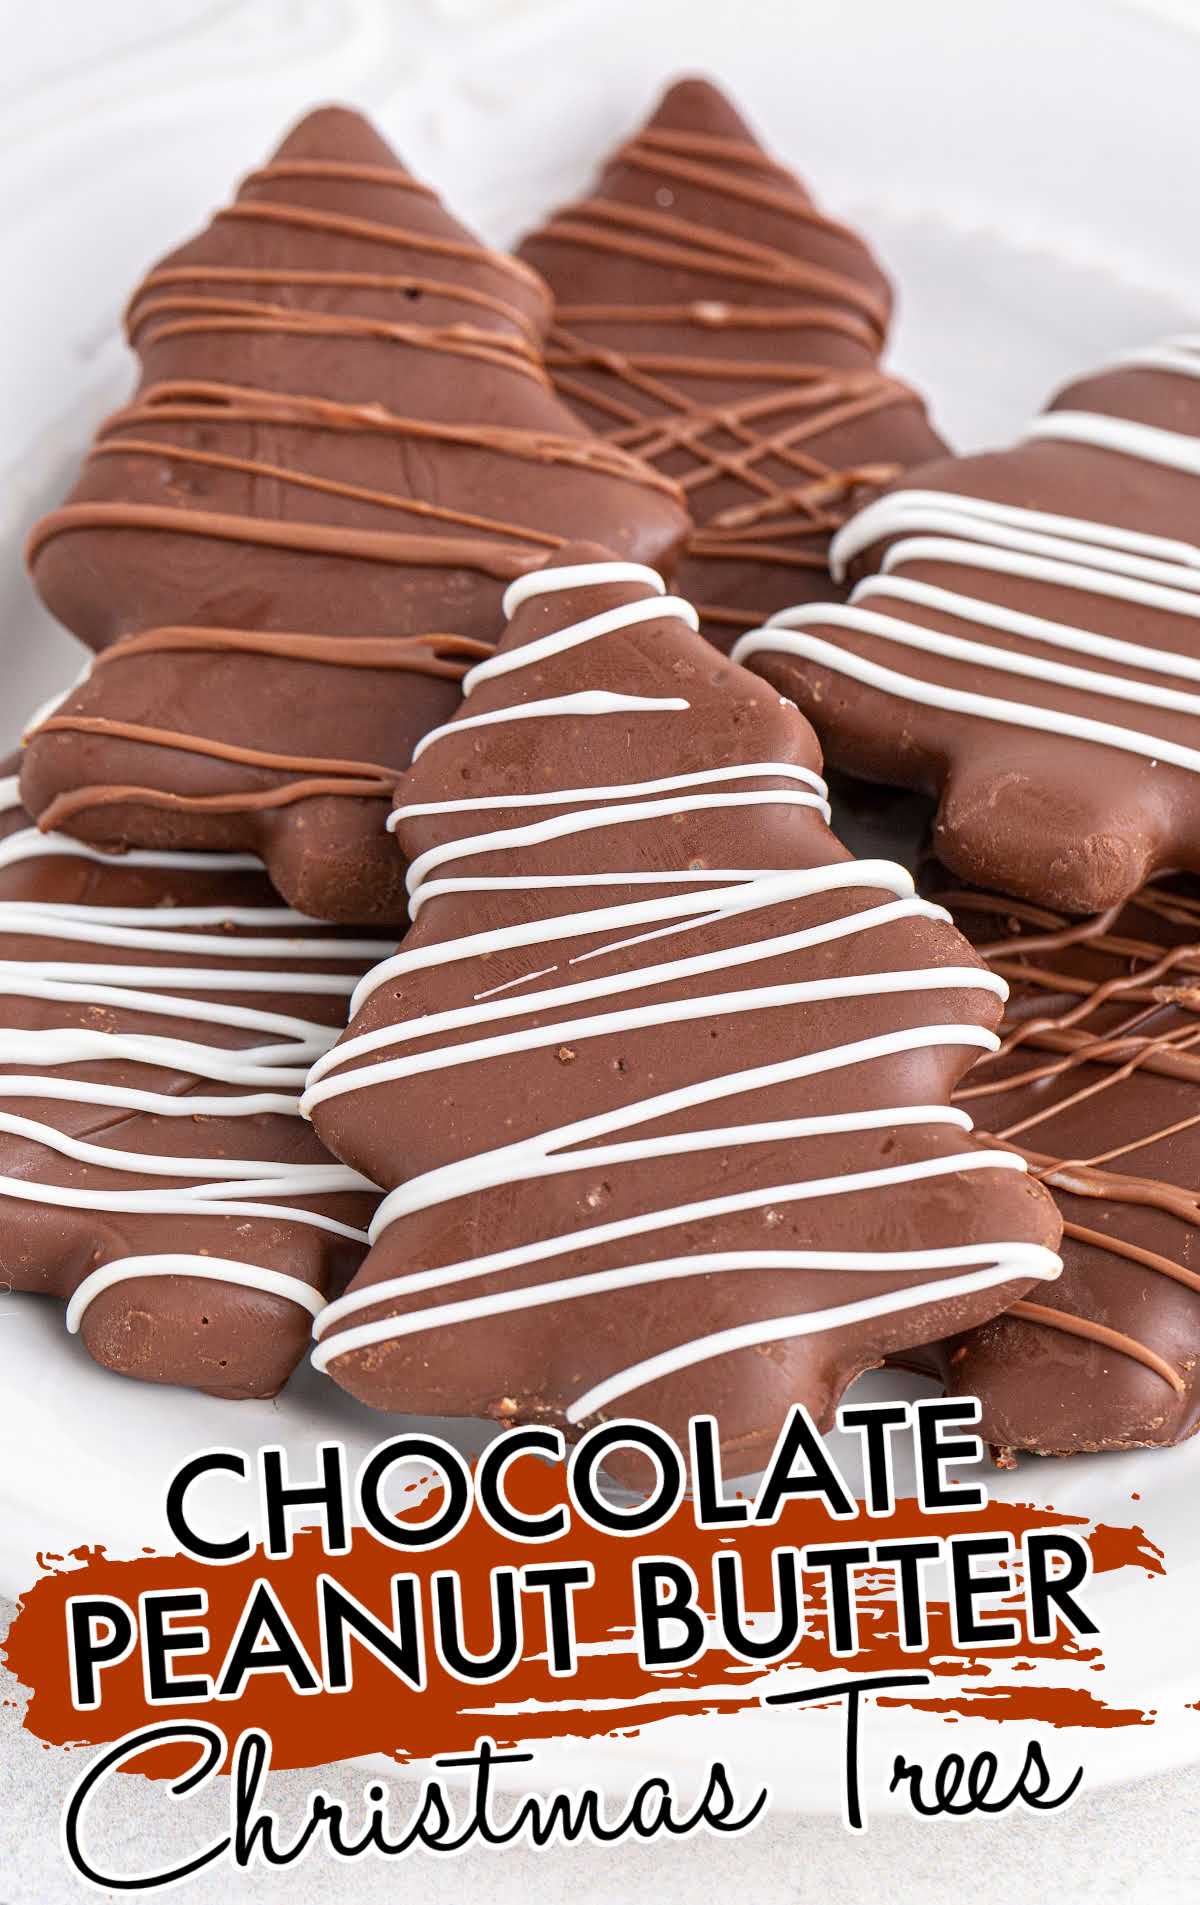
Chocolate Peanut Butter Christmas Trees

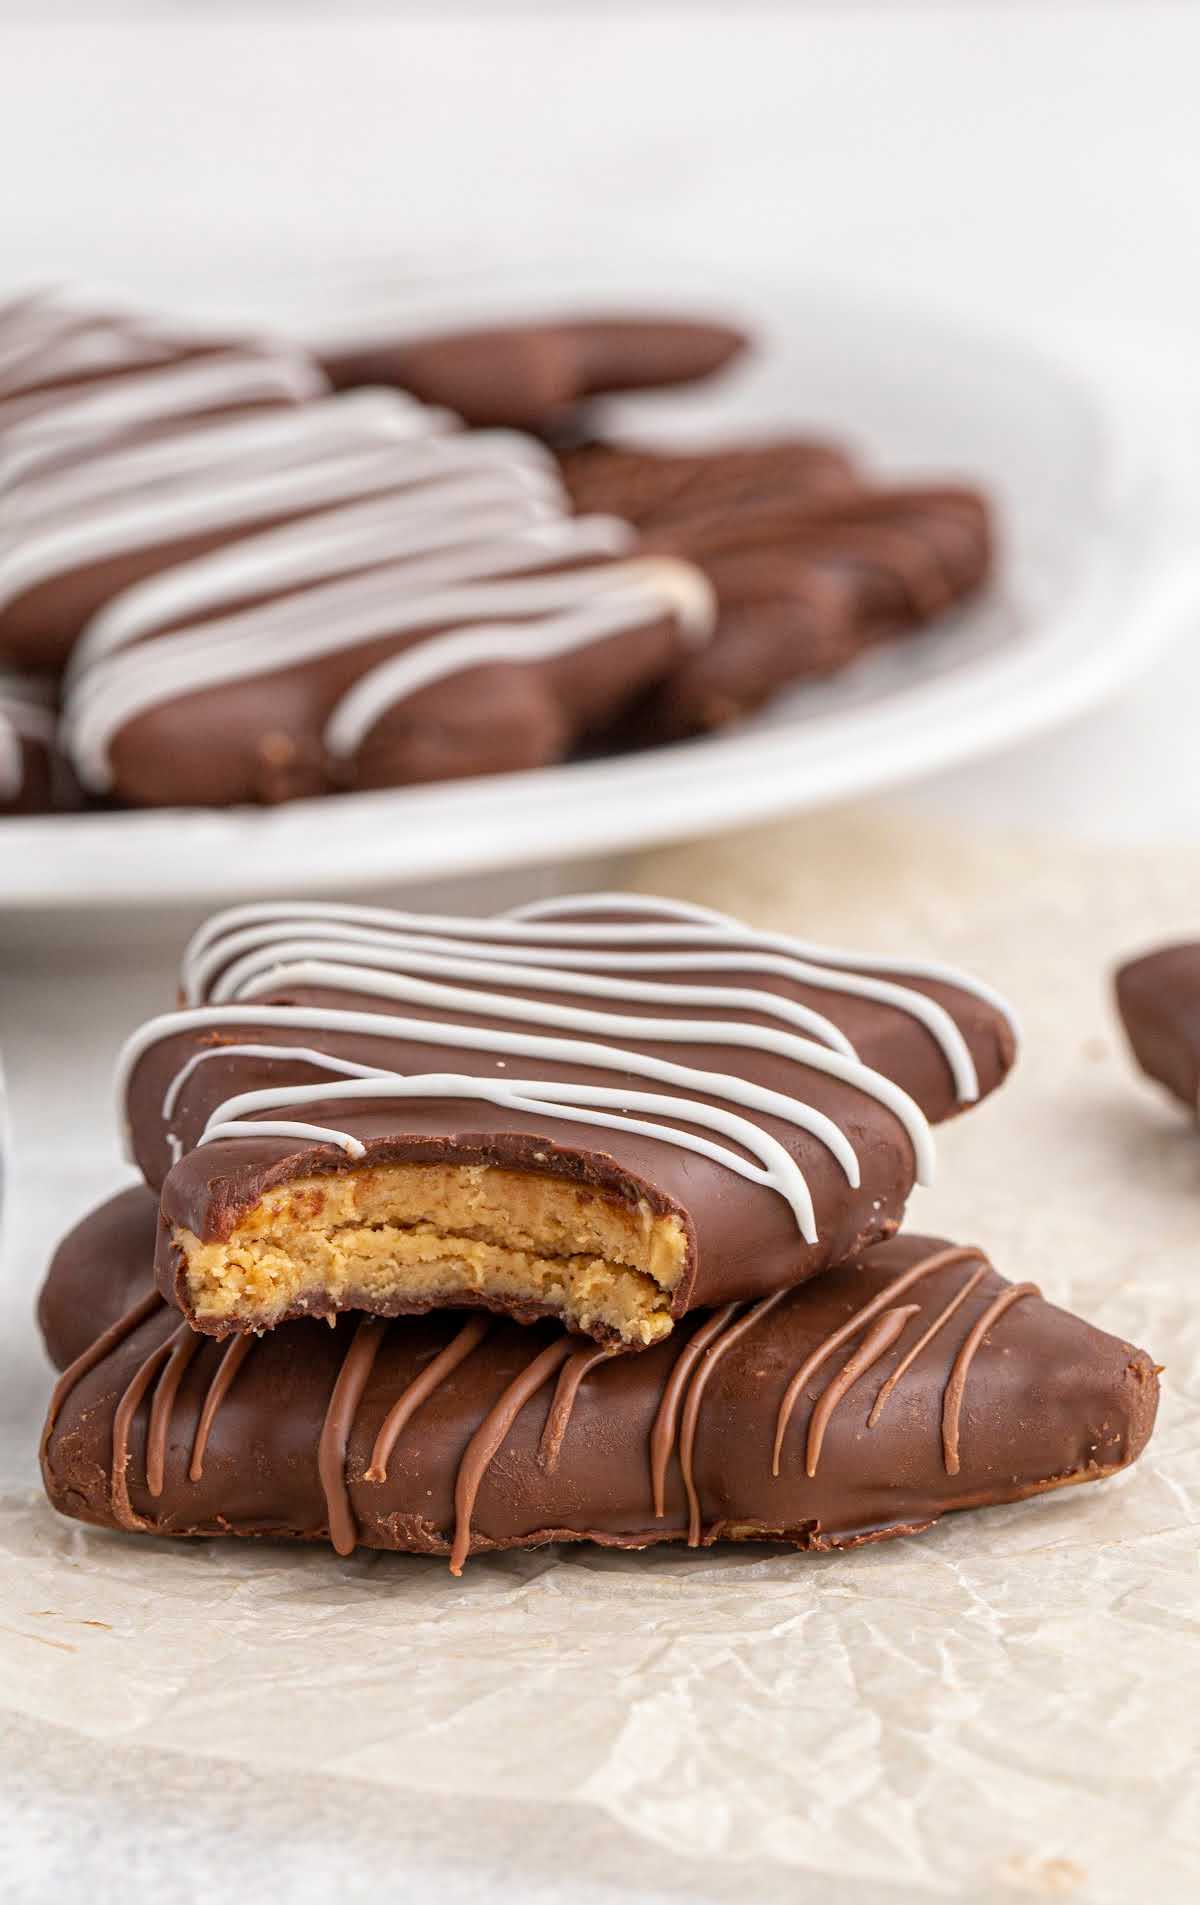
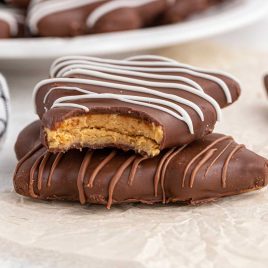
Chocolate peanut butter Christmas trees are a no-bake treat sure to bring out the holiday cheer! Fun and festive, kids and adults will love this candy dessert.
Jump to RecipeTable of Contents
Chocolate peanut butter Christmas trees are a no-bake treat that is destined to be an absolute hit with kids and adults. With a soft peanut butter center and chocolate shell, these rich and decadent confections are easy to make and taste delicious! Featuring the favorite combo of peanut butter and chocolate, these adorable Christmas tree treats are perfect for adding to your festive dessert platters or enjoyed throughout the holidays.
Looking for more fun and festive holiday recipes? Snowmen truffles, reindeer pretzels, and Christmas Wreath Cookies are three more whimsical treats for you to enjoy.
Chocolate Peanut Butter Christmas Trees Ingredients
You will need:
- ½ cup salted butter melted and cooled
- 2 cups creamy peanut butter
- ¼ cup granulated sugar
- 1 tablespoon vanilla extract
- 4 cups powdered sugar
- 3 cups semi-sweet chocolate chips or a combination of semi and milk chocolate chips
- 2 tablespoons shortening
Drizzle
- ½ cup milk chocolate chips or pieces
- ½ cup white chocolate chips or pieces
- 1 teaspoon shortening divided
Substitutions and Additions
CHOCOLATE COATING: You can change up the chocolate coating and/or the drizzle in this sweet treat. Try different colors for the drizzle by adding a few drops of food coloring to make them extra festive for the holiday season. Instead of chocolate chips, you could also opt to use colored candy melts for your trees.
How to Make Chocolate Peanut Butter Christmas Trees
STEP ONE: Line a jelly roll or half-sheet pan with parchment paper and set it aside.
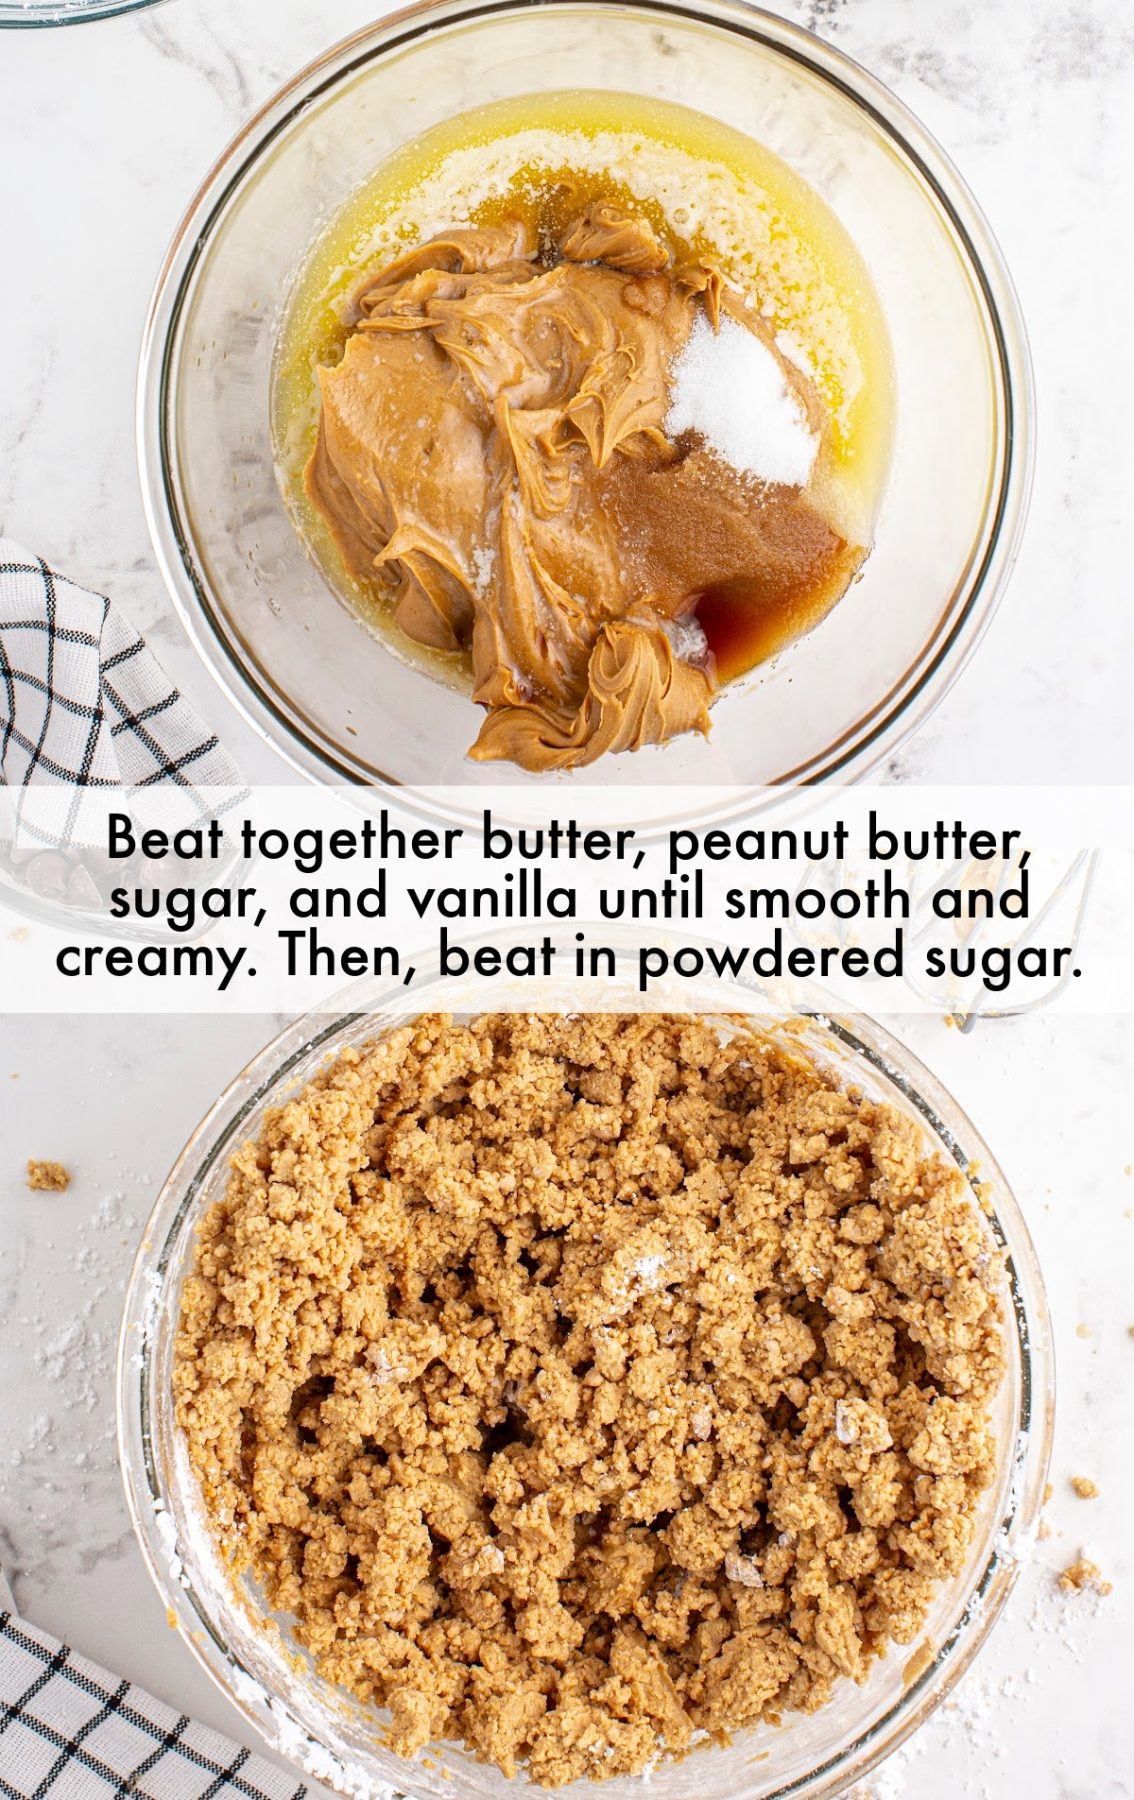
STEP TWO: Using a hand mixer, beat together melted butter, peanut butter, granulated sugar, and vanilla extract until smooth and creamy. Beat in powdered sugar.
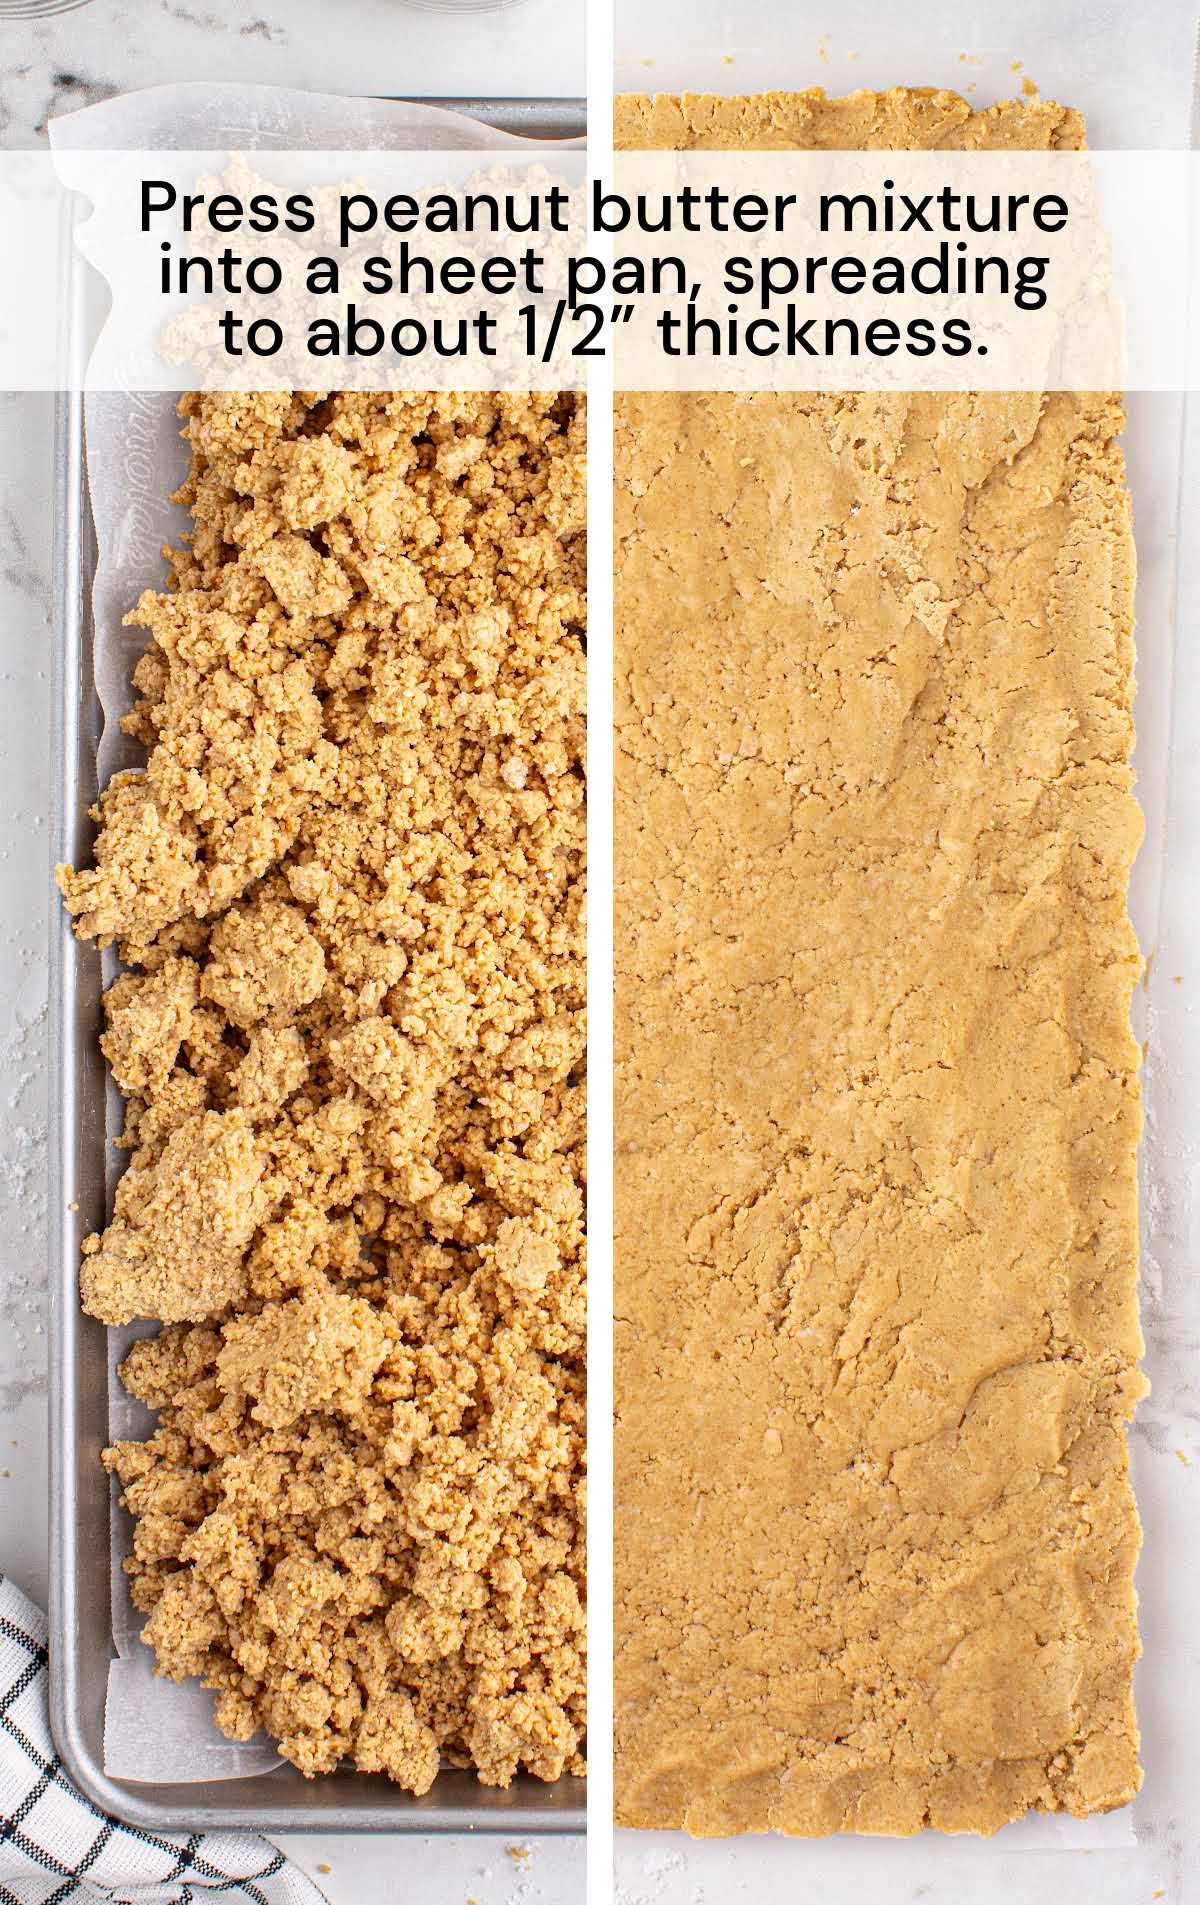
STEP THREE: Press the peanut butter mixture into a sheet pan, spreading to about ½-inch thickness.
STEP FOUR: Place the sheet pan in the freezer for 15 minutes.
STEP FIVE: Lift the parchment paper to remove the chilled peanut butter layer from the pan. Place a new sheet of parchment paper on the pan.
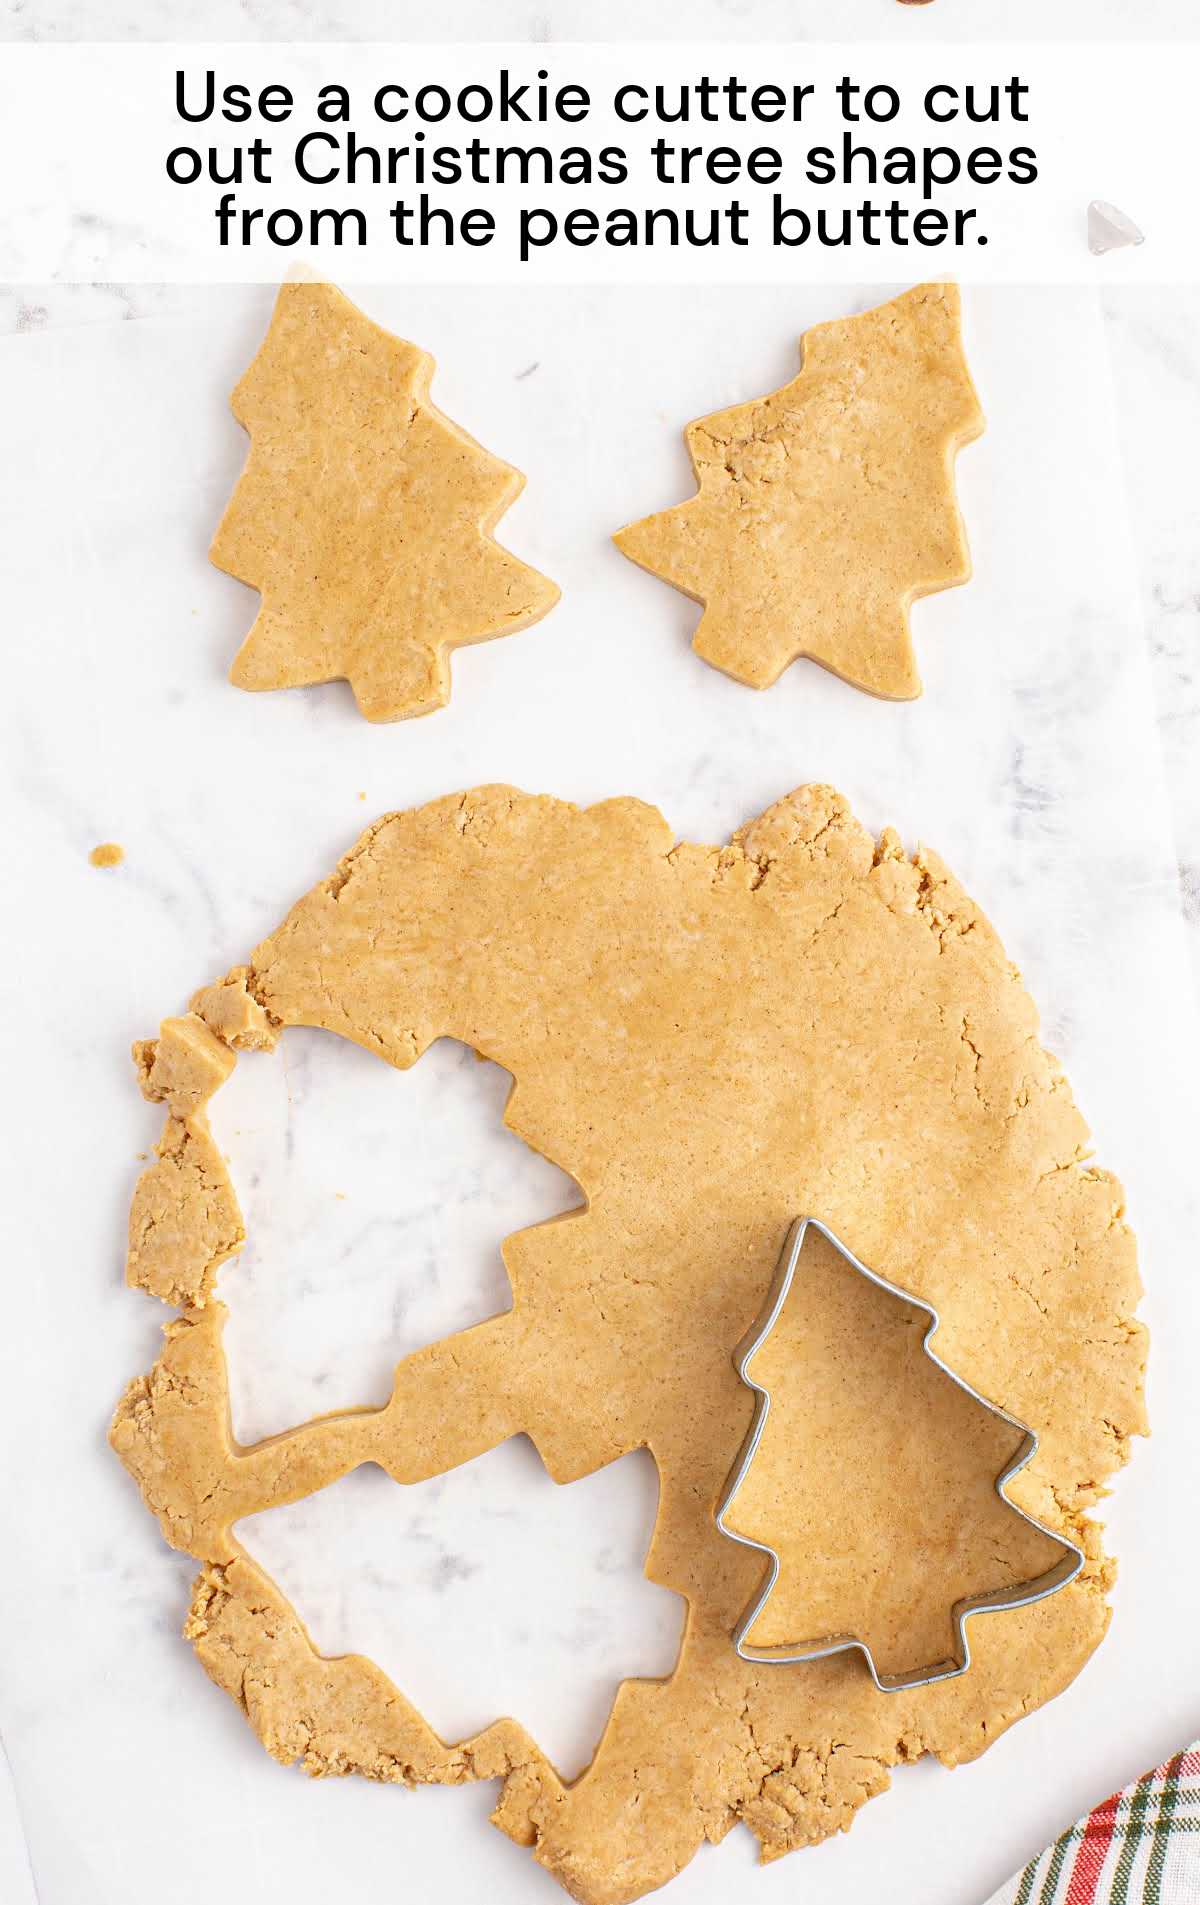
STEP SIX: Use a cookie cutter to cut out ½” thick Christmas tree shapes from the chilled peanut butter layer.
PRO TIP: The number of finished trees that you end up with will vary depending on the size of the cookie cutter.
STEP SEVEN: Place cutouts on a parchment-lined sheet pan. Freeze for 30 minutes.
STEP EIGHT: Scoop up the remnant peanut butter mixture, repress to ½-inch thickness, and cut out additional shapes.
STEP NINE: After the cutouts have chilled for 25 minutes, prepare the chocolate coating.
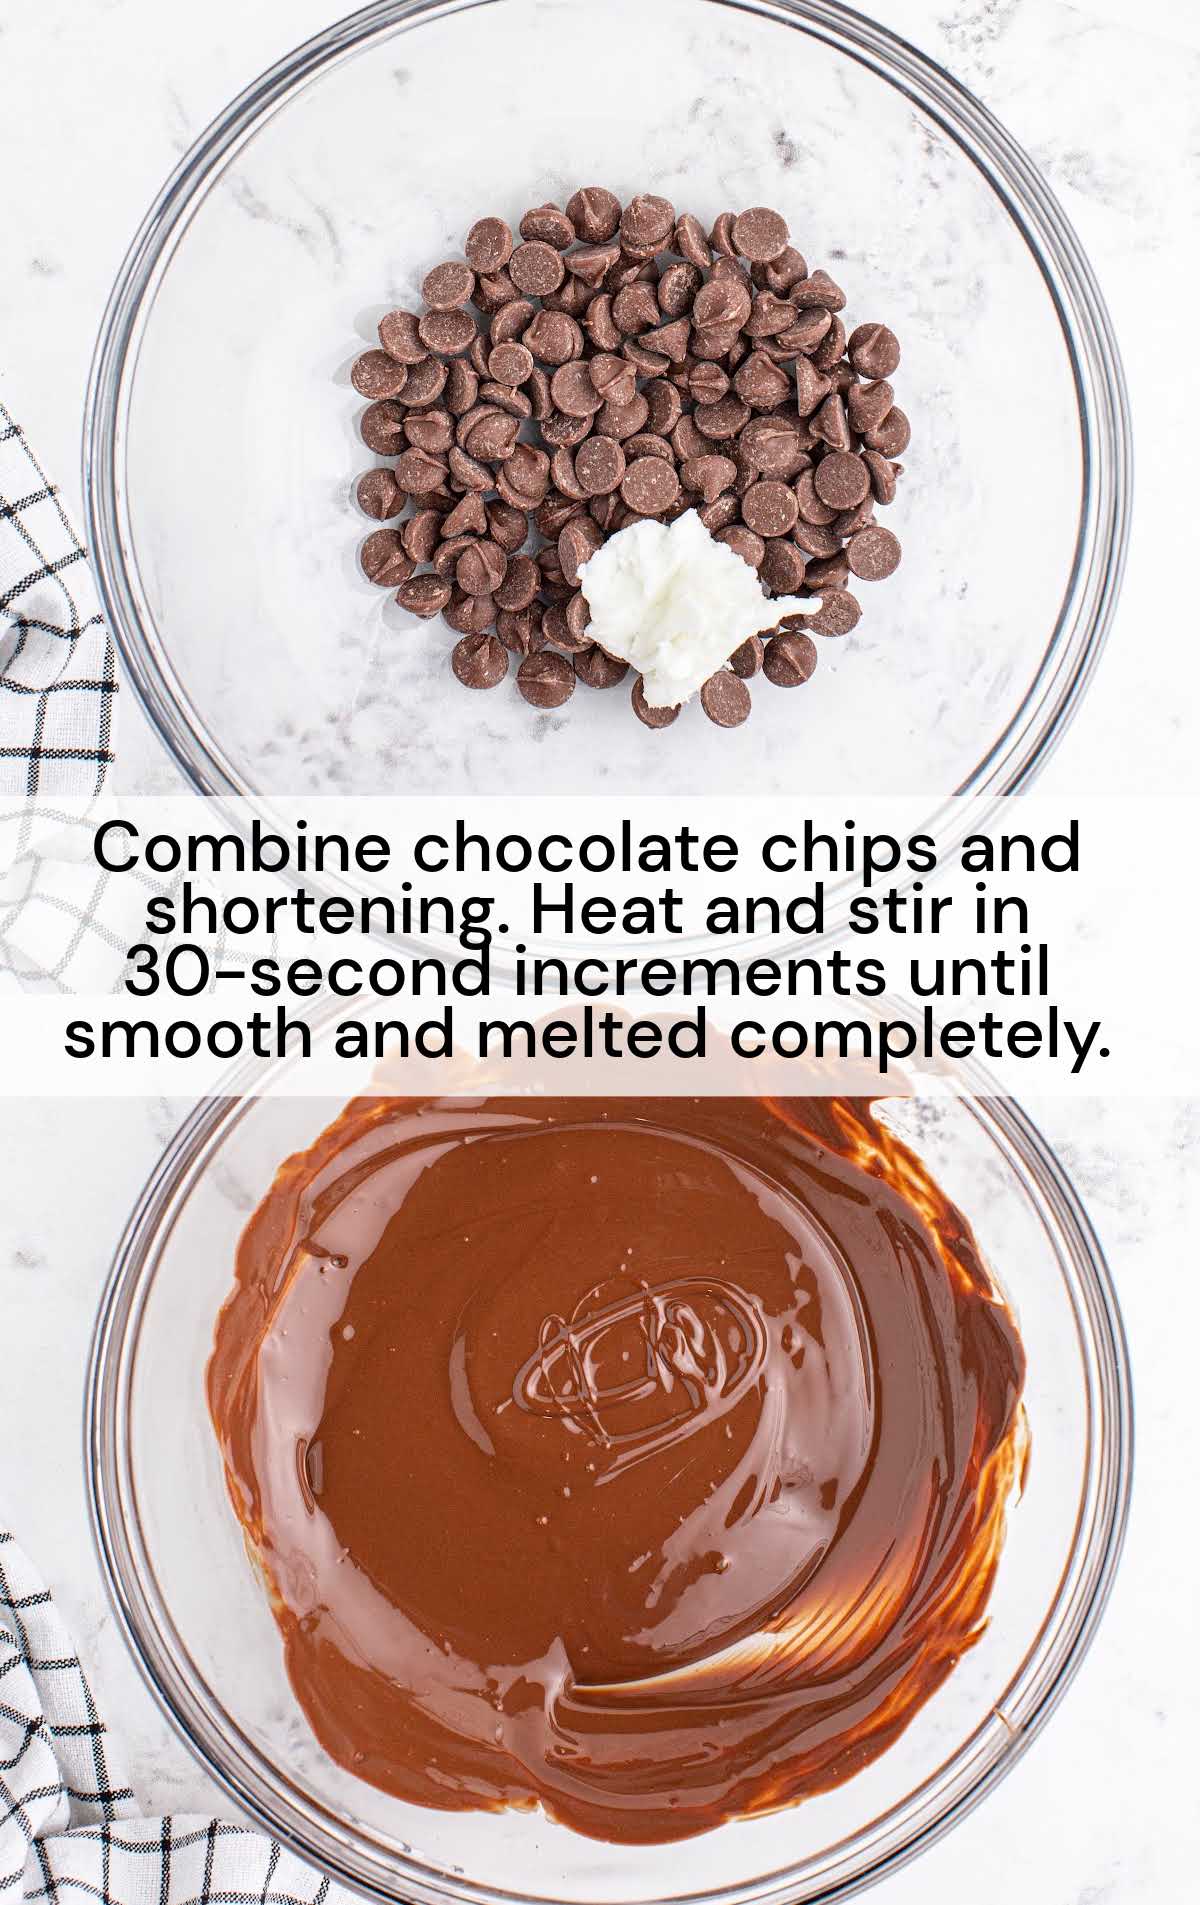
STEP TEN: Combine milk chocolate chips and 2 tablespoons of shortening in a heatproof bowl. Heat and stir in 30-second increments in the microwave until the chocolate is smooth and melted completely.
PRO TIP: The shortening added to the melted chocolate makes it easier for coating and prevents “bloom” on the chocolate (or the discoloration of the chocolate surface). It also makes it soft and will melt or imprint easily if touched.
STEP ELEVEN: Using a fork, lift one peanut butter cutout at a time and coat it completely with the melted chocolate. Tap excess chocolate off the cutout and place it back onto the cookie sheet.
PRO TIP: You can reheat chocolate in short bursts to keep it smooth and easy to use for coating the trees.
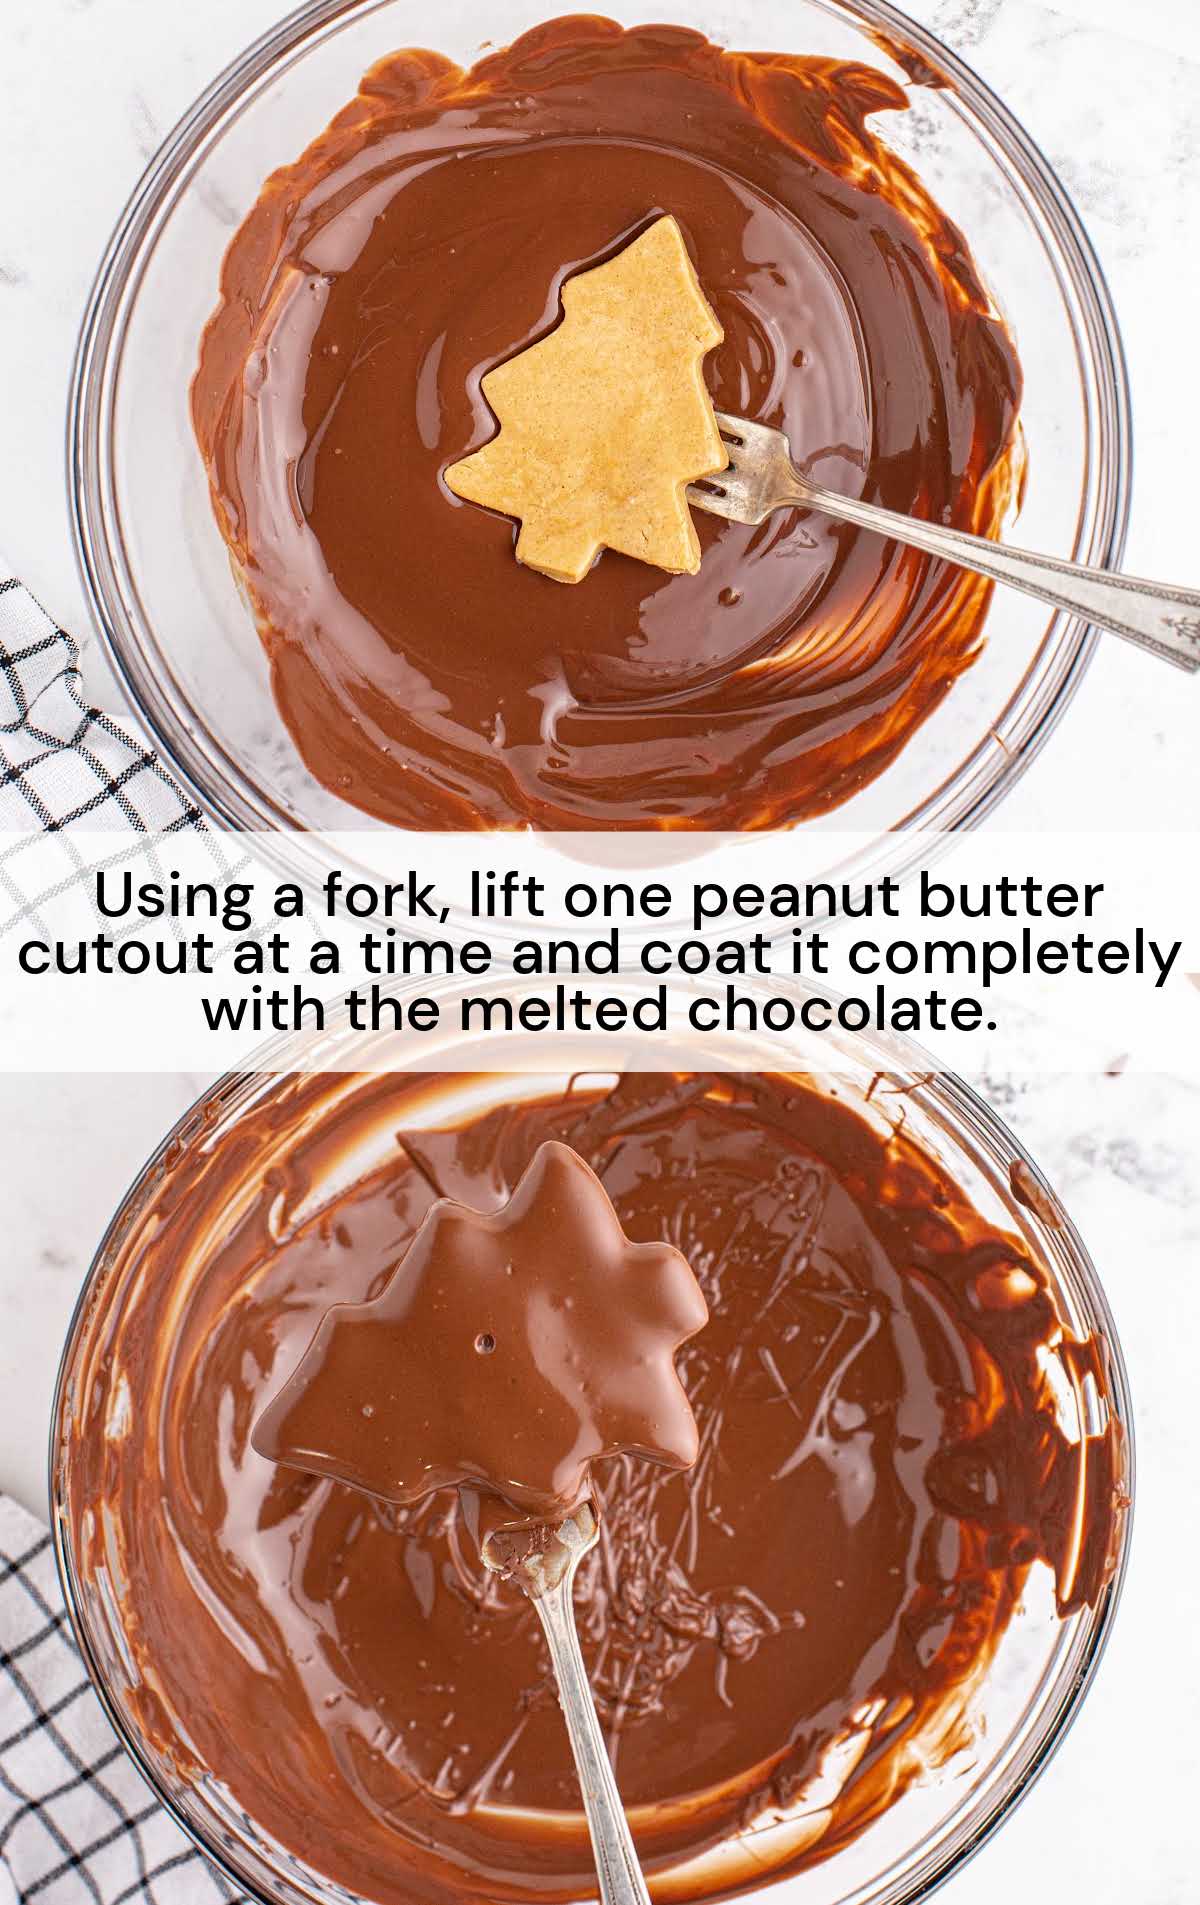
STEP TWELVE: Work in batches if the peanut butter cutout becomes soft quickly.
PRO TIP: To keep the peanut butter trees from softening too quickly, keep the pan in the freezer and only take out a few at a time for coating.
STEP THIRTEEN: Allow chocolate to harden.
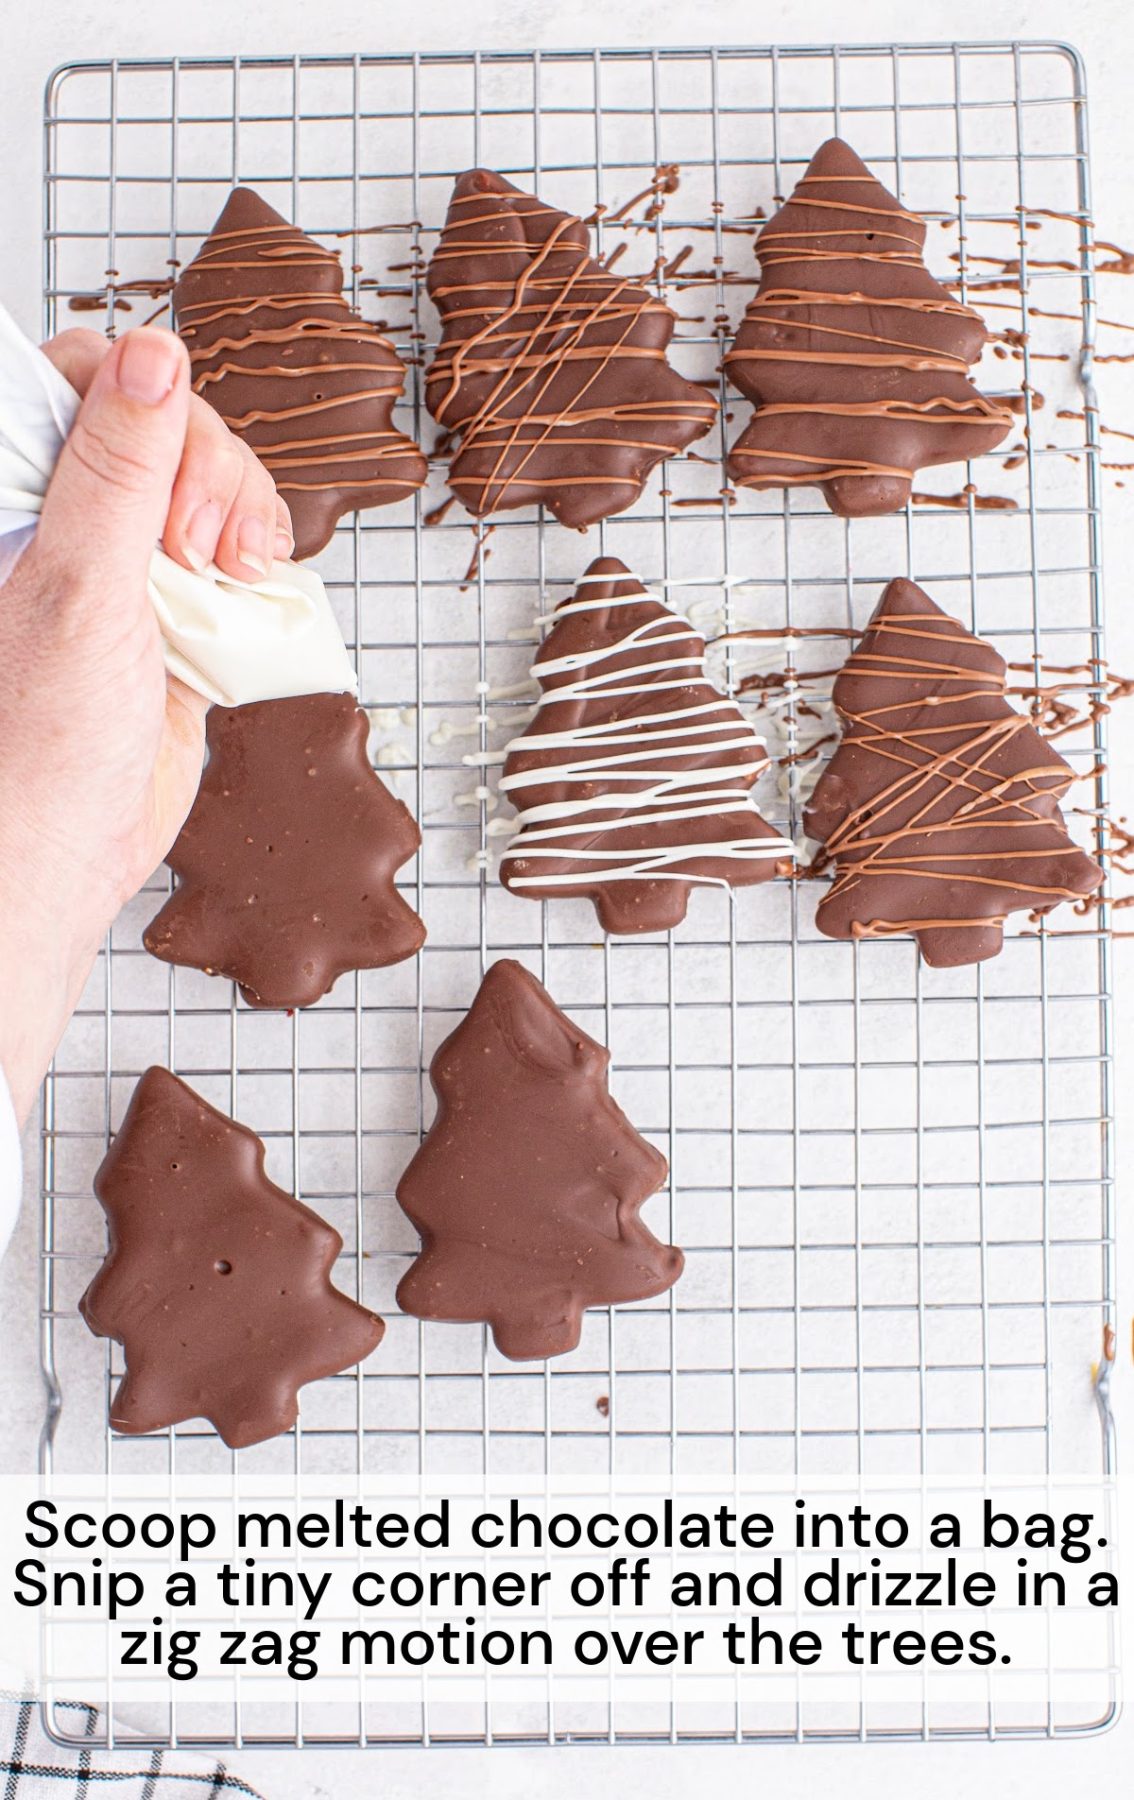
STEP FOURTEEN: For optional drizzle, microwave chocolate chips or chopped pieces and shortening (½ teaspoon per ½ cup) in 30-second increments until melted and smooth.
STEP FIFTEEN: Scoop melted chocolate into a plastic baggy or piping bag. Snip a tiny corner off the baggy and drizzle in a zigzag motion over chocolate-coated trees. Allow chocolate to set, for about 5 minutes.
How to Serve Chocolate Peanut Butter Christmas Trees
These peanut butter candy treats would be a great addition to a dessert platter or as party favors for a holiday get-together. They would also be a cute stocking stuffer wrapped in cellophane and a festive ribbon. Wrap each individual tree in a small cellophane bag with a holiday-colored ribbon to make them festive. Of course you can also just make them to enjoy at home with your family throughout the holidays!
Storage
ON THE COUNTER: Cover these chocolate peanut butter treats and store them on the countertop at room temperature.
IN THE FRIDGE: You can also store them in the refrigerator for up to 7 days.
IN THE FREEZER: Freeze candy trees for up to 3 months for longer storage, but note that discoloration of the chocolate may occur. Defrost in the refrigerator before serving.
Chocolate peanut butter Christmas trees bring out the holiday cheer! They don’t just look fun and festive, they taste amazing, too. Chocolate and peanut butter are the perfect combination, and these rich and decadent chocolate peanut butter Christmas trees are the perfect way to celebrate. This recipe for homemade chocolate peanut butter Christmas trees will delight your friends and family all throughout the holiday season.
FREQUENTLY ASKED QUESTIONS
Can I make these treats using silicone molds?
While we haven’t tried it, if you have experience using silicone molds, you could certainly try making them that way instead.
What is a jelly roll pan?
A jelly roll pan is a rimmed baking sheet that measures about 15 inches by 10 inches.
Can I freeze these treats?
Freeze candy trees for up to 3 months for longer storage, but note that discoloration of the chocolate may occur. Defrost in the refrigerator before serving.
MORE RECIPES YOU’LL LOVE
- No-Bake Chocolate Cherry Lush
- Peanut Butter Dream Bars
- Reese’s Peanut Butter Fudge
- Peanut Butter Lasagna
Chocolate Peanut Butter Christmas Trees
Chocolate peanut butter Christmas trees are a no-bake treat sure to bring out the holiday cheer! Fun and festive, kids and adults will love this candy dessert.
Ingredients
- ½ cup salted butter melted and cooled
- 2 cups creamy peanut butter
- ¼ cup granulated sugar
- 1 tablespoon vanilla extract
- 4 cups powdered sugar
- 3 cups semi-sweet chocolate chips or a combination of semi and milk chocolate chips
- 2 tablespoons shortening
Drizzle
- ½ cup milk chocolate chips or pieces
- ½ cup white chocolate chips or pieces
- 1 teaspoon shortening divided
Instructions
- Line a jelly roll or half-sheet pan with parchment paper and set it aside.
- Using a hand mixer, beat together melted butter, peanut butter, granulated sugar, and vanilla extract until smooth and creamy. Beat in powdered sugar.
- Press the peanut butter mixture into a sheet pan, spreading to about ½-inch thickness.
- Place the sheet pan in the freezer for 15 minutes.
- Lift the parchment paper to remove the chilled peanut butter layer from the pan. Place a new sheet of parchment paper on the pan.
- Use a cookie cutter to cut out ½” thick Christmas tree shapes from the chilled peanut butter layer.
- Place cutouts on a parchment-lined sheet pan. Freeze for 30 minutes.
- Scoop up the remnant peanut butter mixture, repress to ½-inch thickness, and cut out additional shapes.
- After the cutouts have chilled for 25 minutes, prepare the chocolate coating.
- Combine milk chocolate chips and 2 tablespoons of shortening in a heatproof bowl. Heat and stir in 30-second increments in the microwave until the chocolate is smooth and melted completely.
- Using a fork, lift one peanut butter cutout at a time and coat it completely with the melted chocolate. Tap excess chocolate off the cutout and place it back onto the cookie sheet.
- Work in batches if the peanut butter cutout becomes soft quickly.
- Allow chocolate to harden.
- For optional drizzle, microwave chocolate chips or chopped pieces and shortening (½ teaspoon per ½ cup) in 30-second increments until melted and smooth.
- Scoop melted chocolate into a plastic baggy or piping bag. Snip a tiny corner off the baggy and drizzle in a zigzag motion over chocolate-coated trees. Allow chocolate to set, for about 5 minutes.
Notes
PRO TIP: The number of finished trees that you end up with will vary depending on the size of the cookie cutter.
PRO TIP: The shortening added to the melted chocolate makes it easier for coating and prevents “bloom” on the chocolate (or the discoloration of the chocolate surface). It also makes it soft and will melt or imprint easily if touched.
PRO TIP: You can reheat chocolate in short bursts to keep it smooth and easy to use for coating the trees.


Leave a Comment