Published on
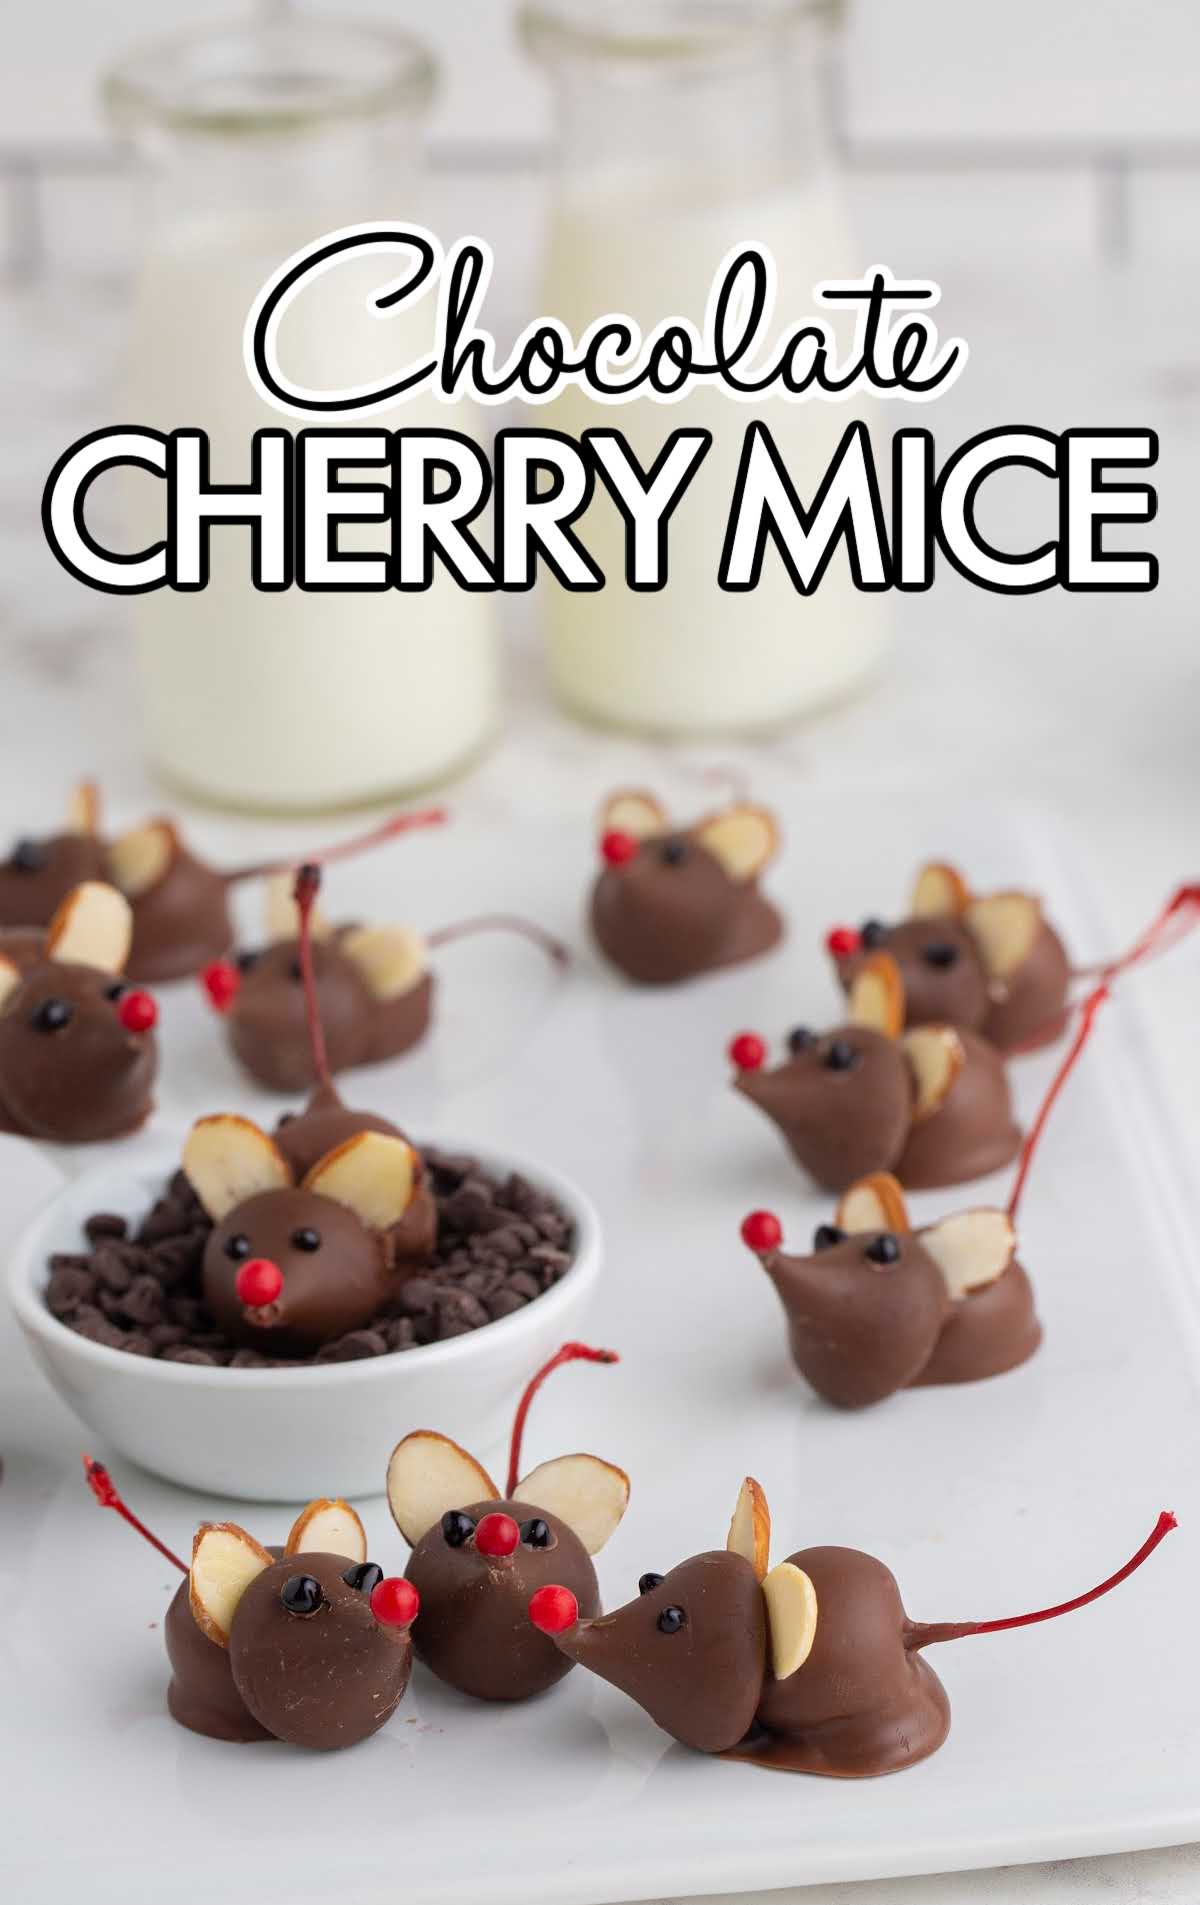
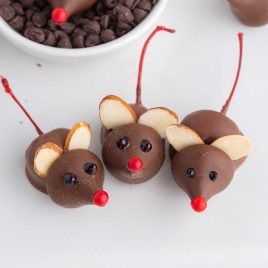
Chocolate Cherry Mice

Chocolate cherry mice candies are whimsical little creatures made with candy and nuts. Kids of all ages will have a blast making and eating these chocolate mice.
Jump to RecipeTable of Contents
Chocolate Cherry Mice couldn’t be more adorable. These cute treats would be a fun addition to any holiday party table or just for fun! Tasty chocolate-covered cherries with a sweet little Hershey’s kiss face create a whimsical mouse that is fun to make and eat.
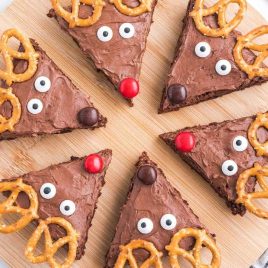
Looking for more cute and festive treats? Try making snowmen truffles, reindeer pretzels, and Christmas wreath cookies.
Chocolate Cherry Mice Ingredients
You will need:
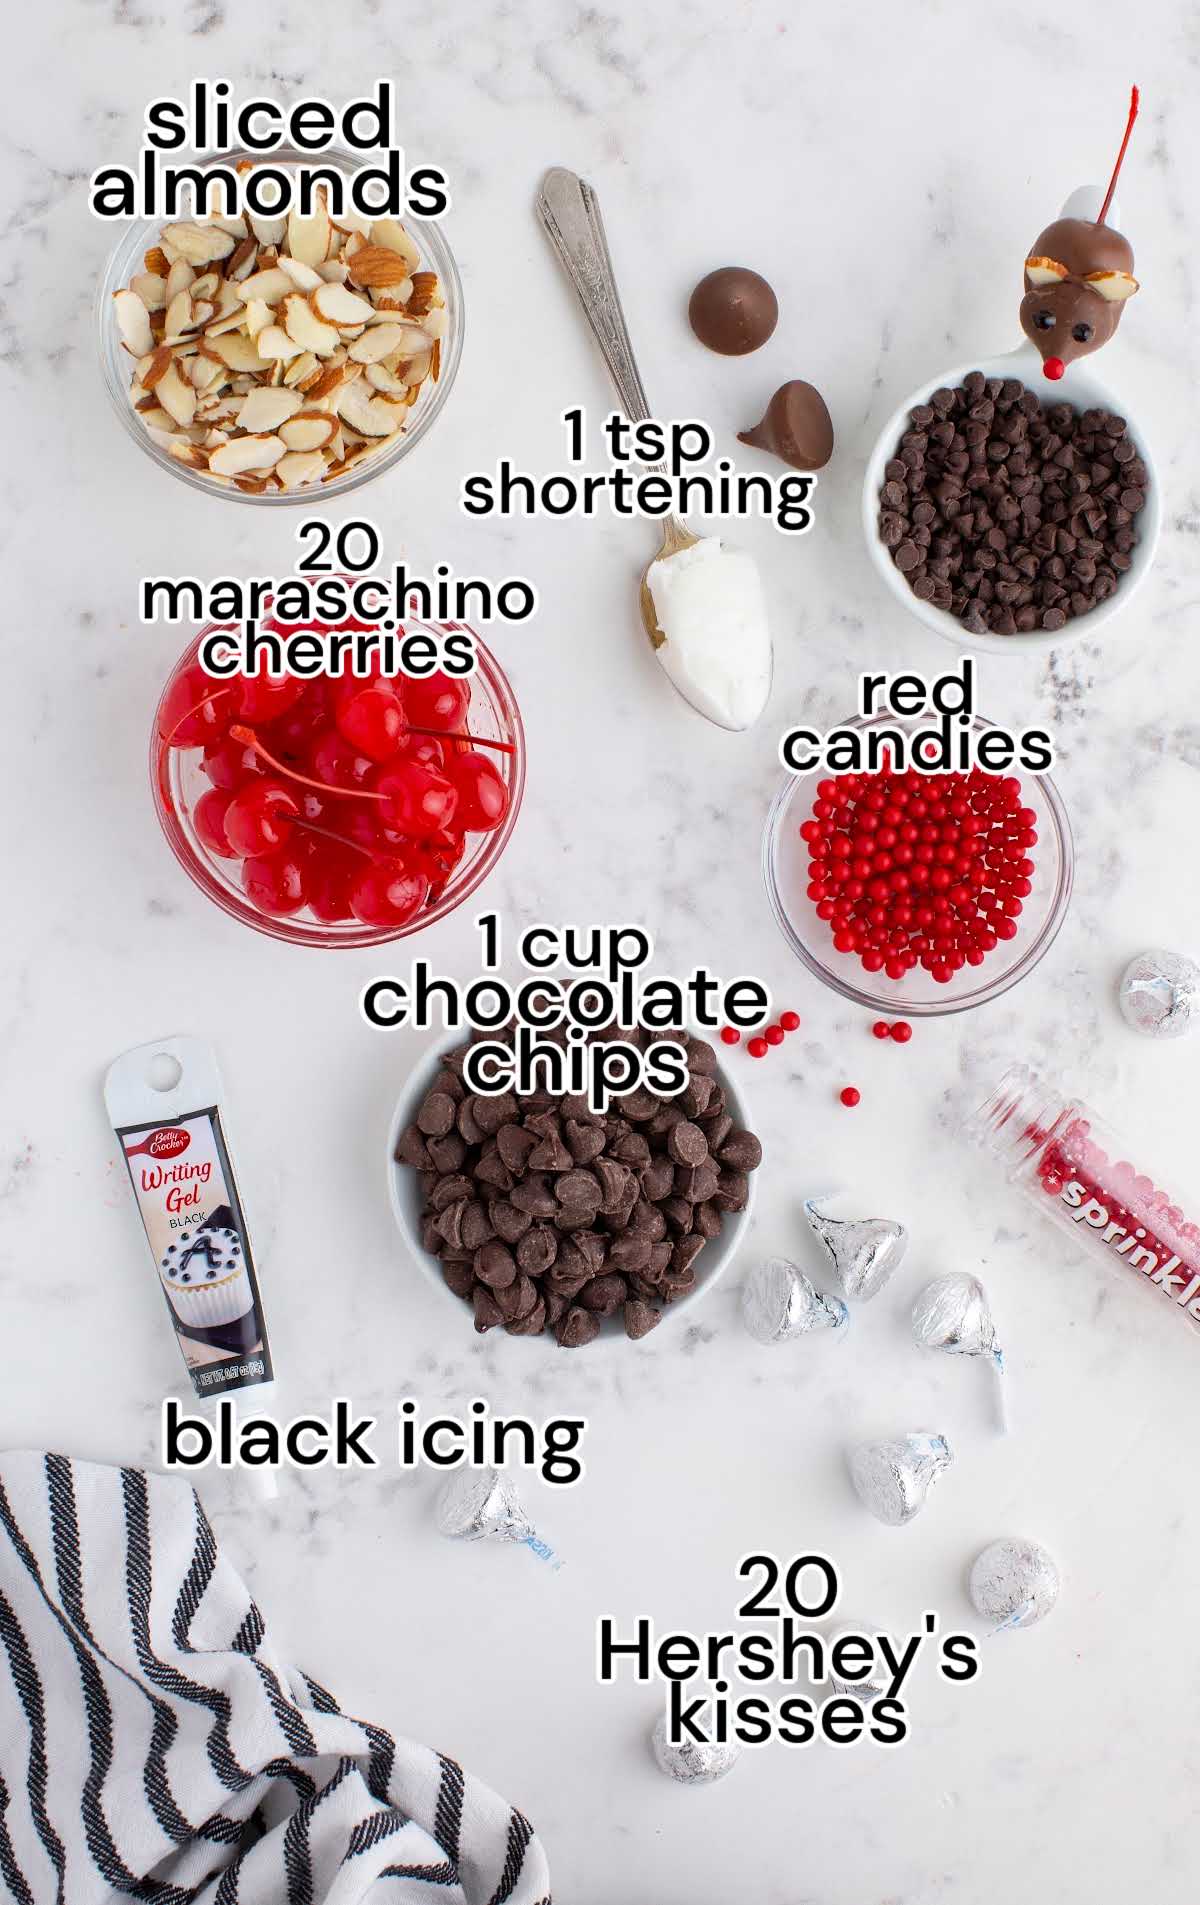
- 1 cup milk chocolate chips
- 1 teaspoon shortening
- 20 maraschino cherries with stems
- 20 Hershey’s kisses
- sliced almonds have more than enough for matching sizes and because they break easily
- black icing writer
- small red candies such as dragees or cinnamon candies
Substitutions and Additions
EYES AND EARS: You could use mini chocolate chips for the eyes or peanut halves for the ears instead for these adorable little critters.
PEANUT-FREE: If you don’t want to use peanuts or almonds, you could use pieces of dried cereal or other candies for the ears.
HERSHEY’S KISSES: You can use any flavor of Hershey kisses in this fun recipe.
How to Make Chocolate Cherry Mice
STEP ONE: Place chocolate chips and shortening in a small microwave-safe mixing bowl.
STEP TWO: Heat in 30-second increments, stirring between each, until chips are mostly melted.
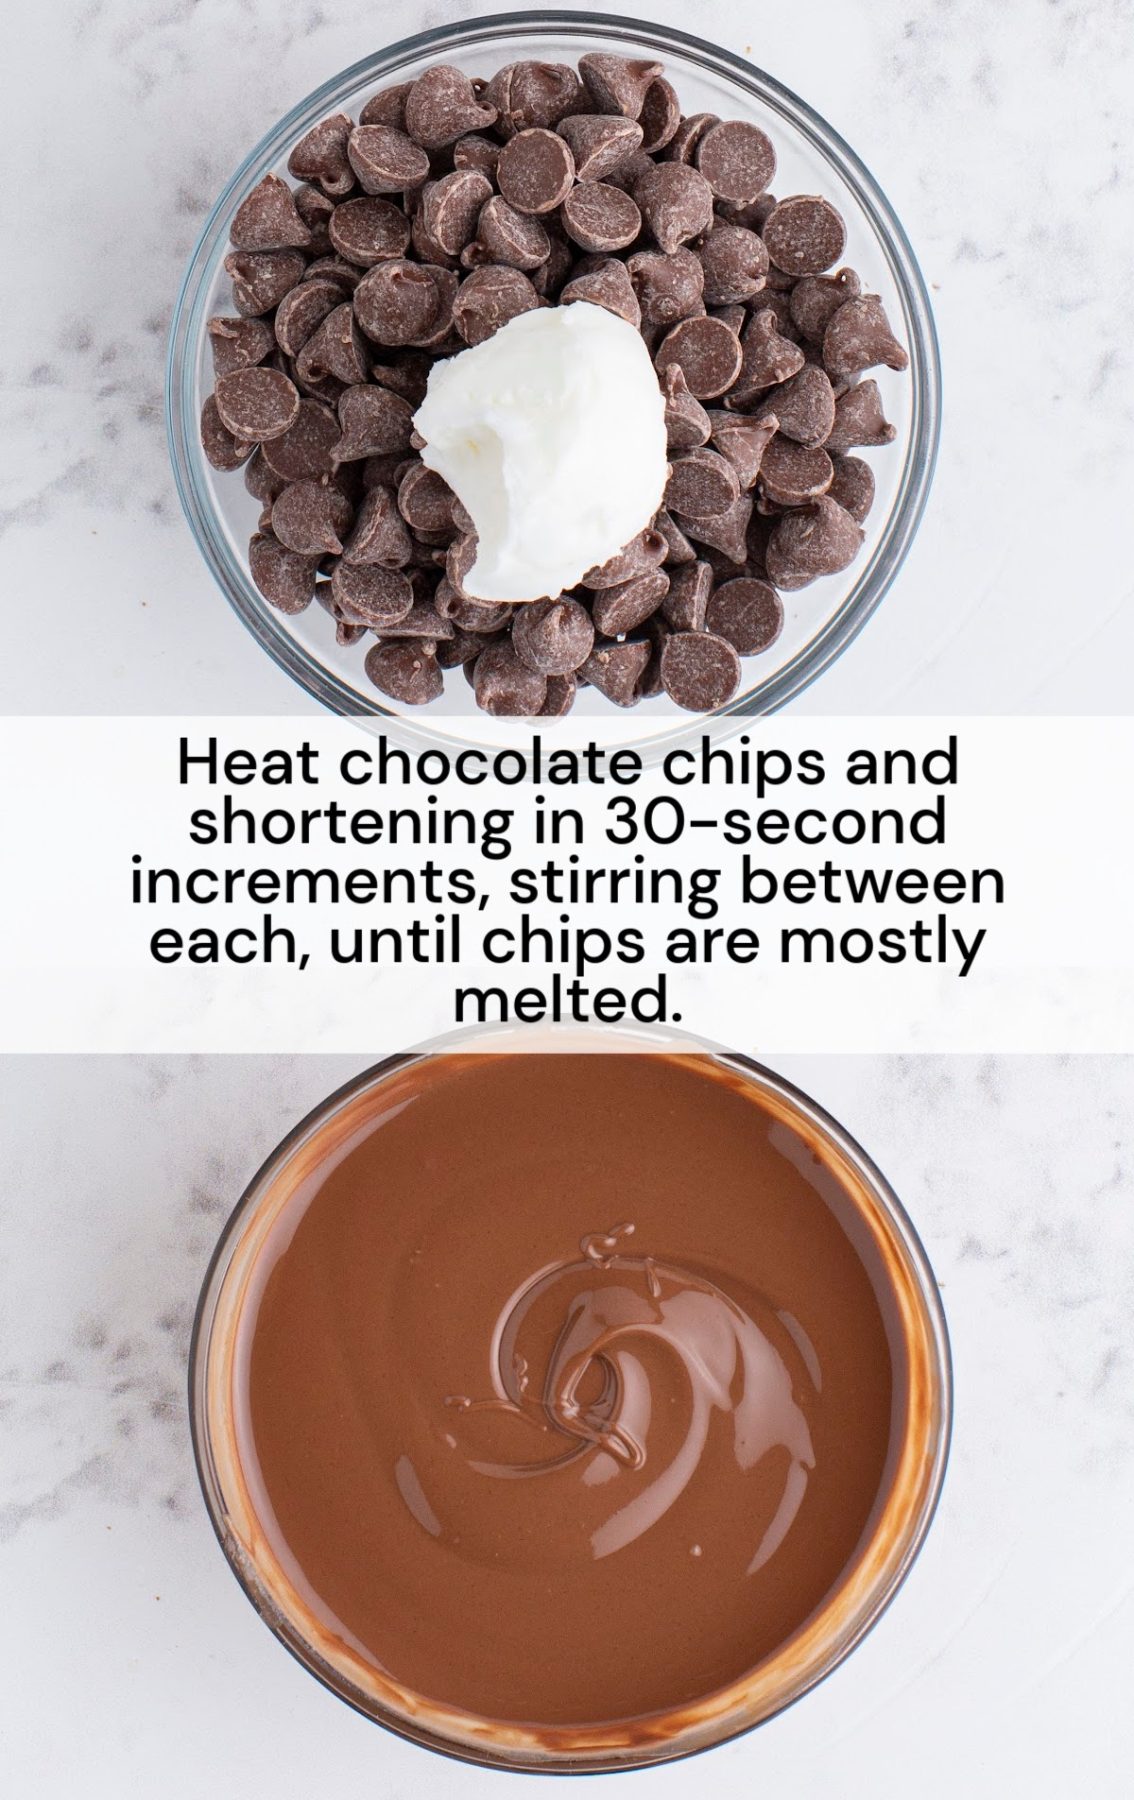
STEP THREE: Stop heating and continue stirring until the mixture is fully melted and smooth.
STEP FOUR: Spread a sheet of parchment paper on your work surface.
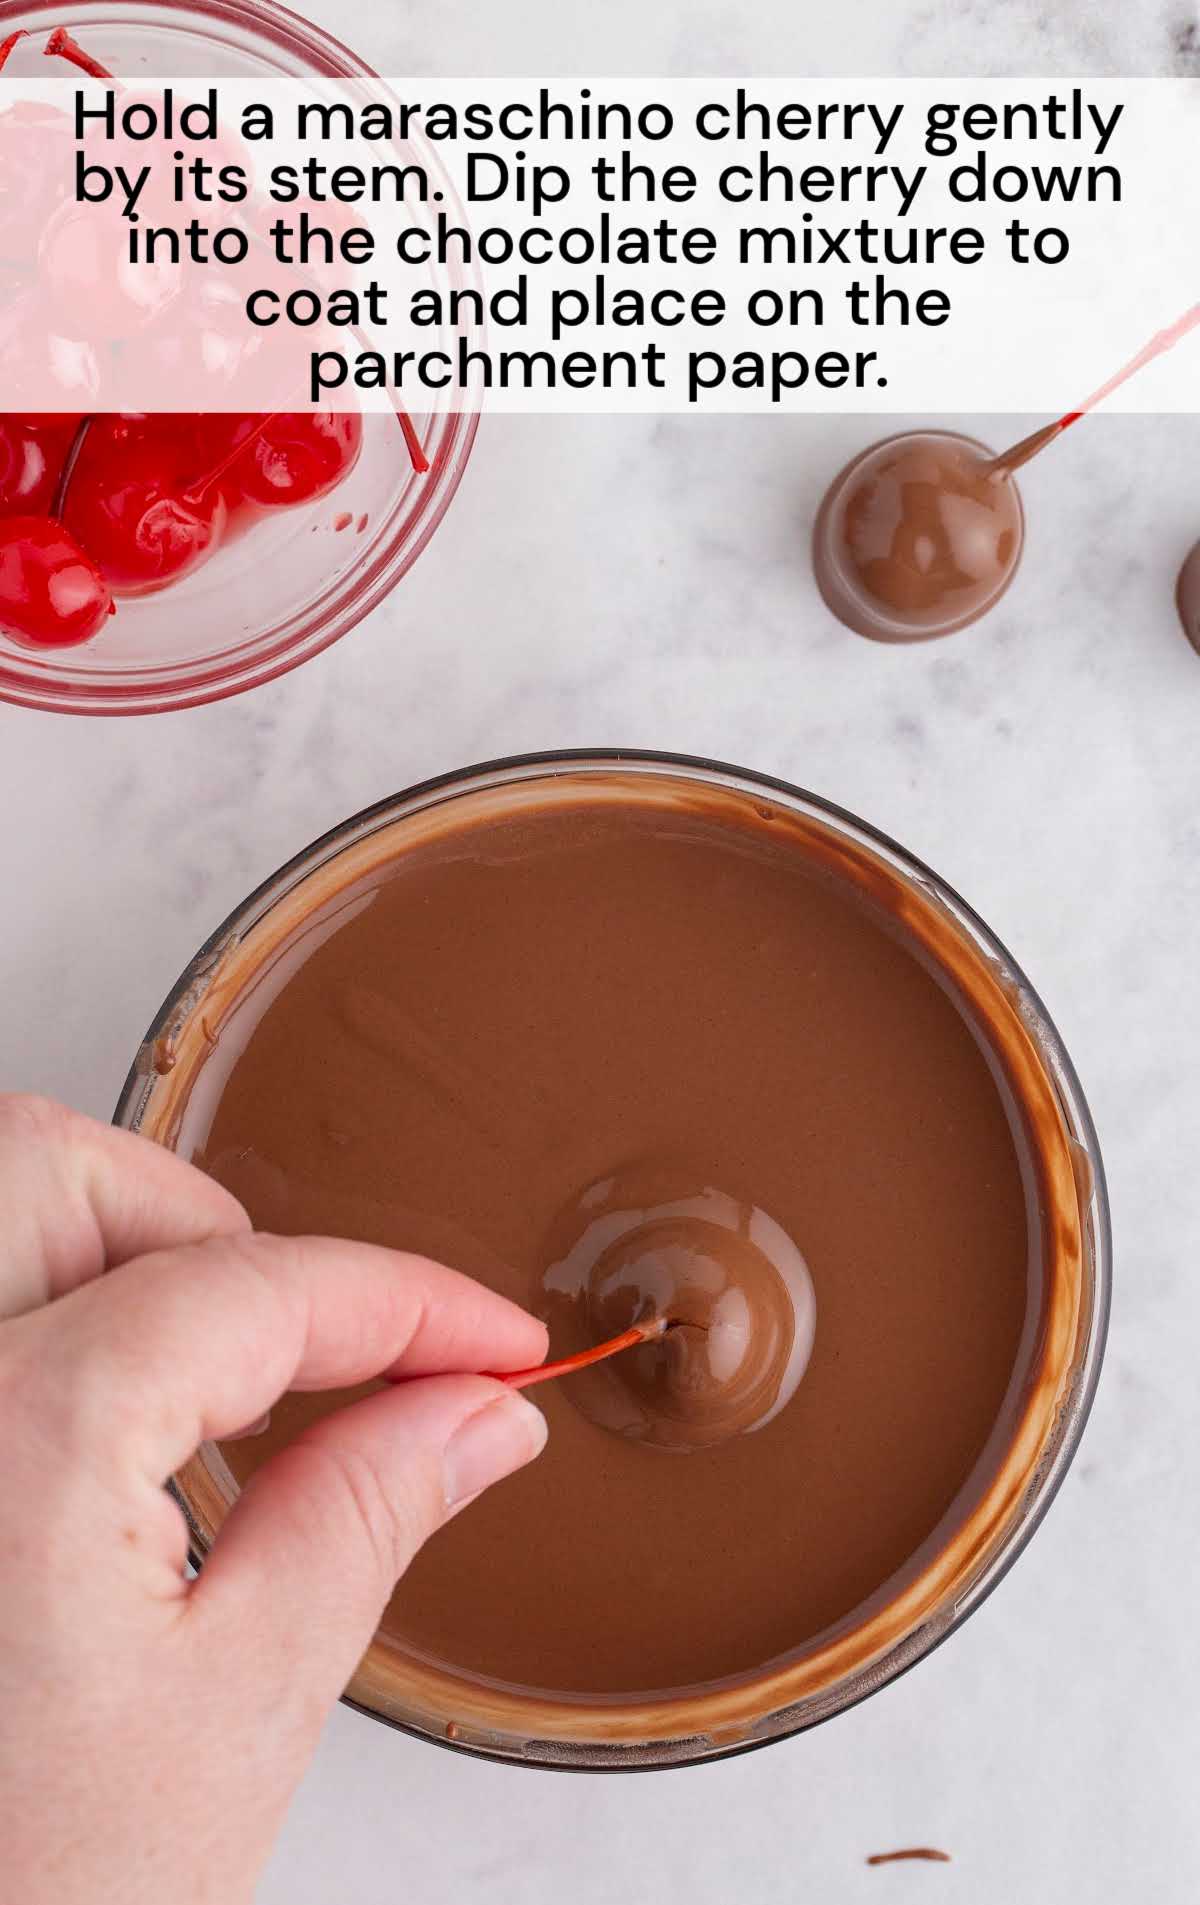
STEP FIVE: Hold a maraschino cherry gently by its stem. Be sure any excess cherry juice has been removed, or dab the cherry onto a paper towel. Dip the cherry down into the chocolate mixture to coat well. Lift out and place on the parchment paper. You can adjust how you set the cherry to determine how the “tail” of the “mouse” will set.
PRO TIP: Reheat the chocolate for 15 seconds at a time if it begins to thicken too much for dipping.
STEP SIX: Place a Hershey’s kiss with the flat side leaned onto the chocolate-dipped cherry to form the mouse’s head.

STEP SEVEN: Repeat these steps for about half of the cherries. This will allow the chocolate to set up just a bit before adding the other face components.
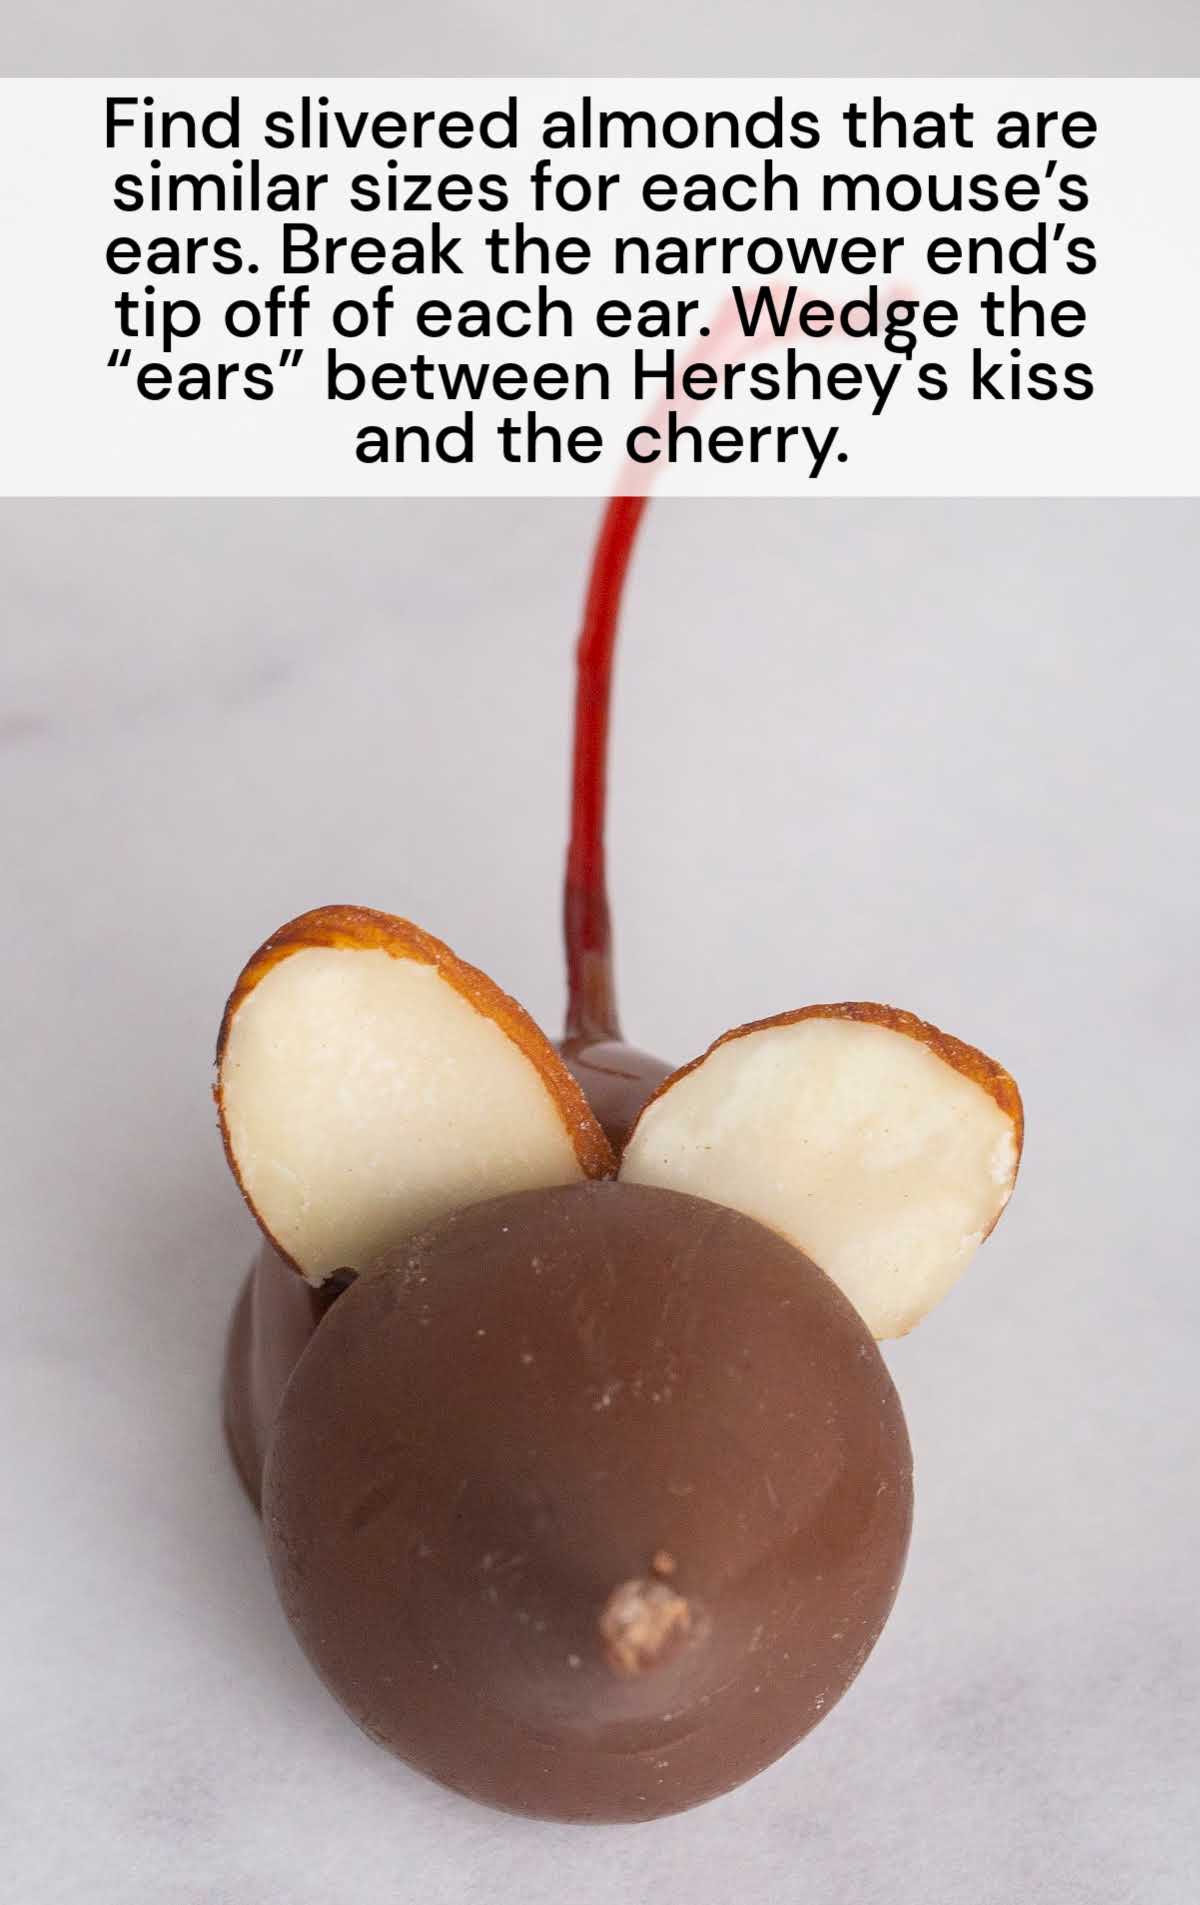
STEP EIGHT: Identify slivered almonds that are similar in size for each mouse’s ears. Break the narrower end’s tip off of each ear. Wedge the “ears” between Hershey’s kiss and the cherry.
PRO TIP: Apart from dipping the cherries, the chocolate actually works best if it’s cooled and thickened. Allow the chocolate to cool before trying to place the ears or nose.
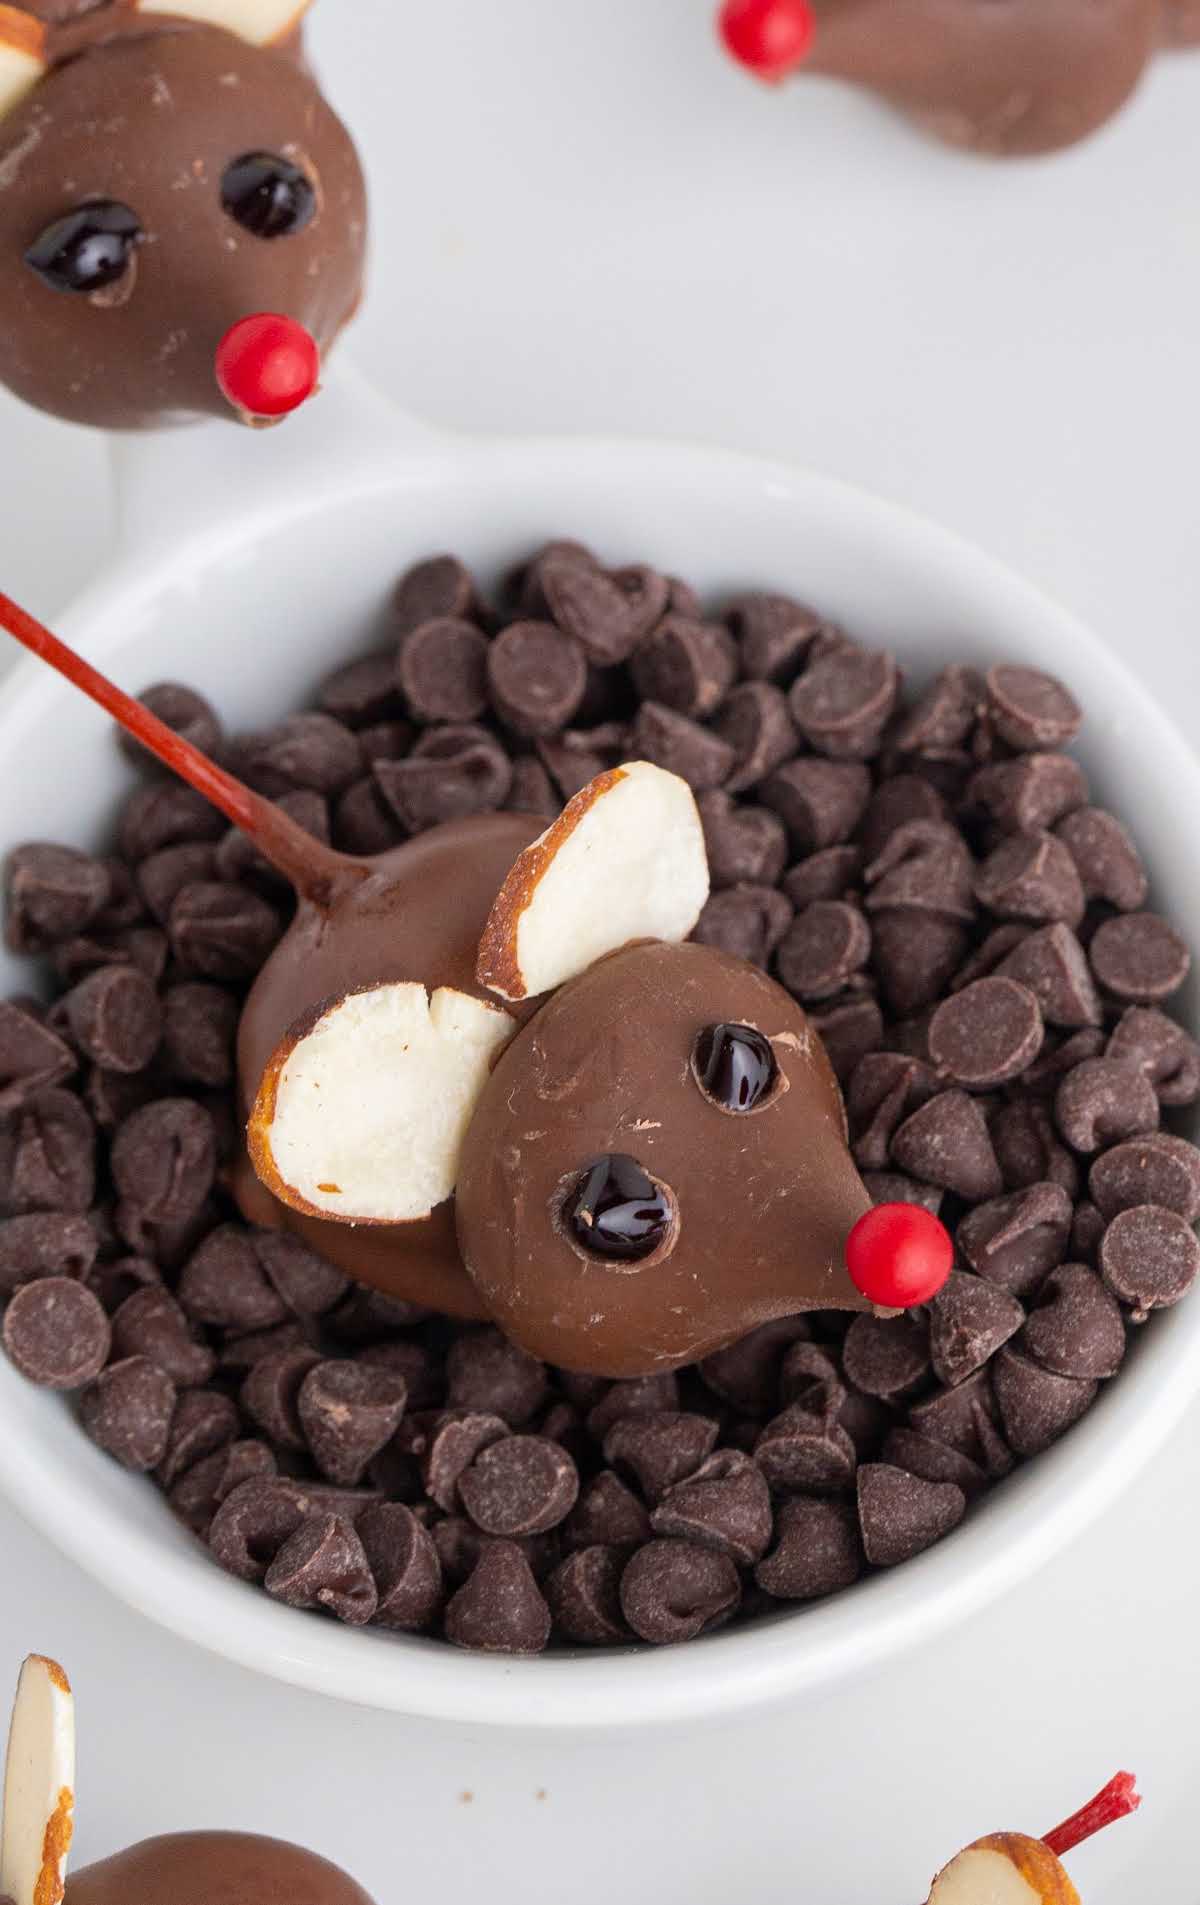
STEP NINE: Use a small hole in the icing writer and dot two eyes onto the mouse’s head.
STEP TEN: With a toothpick, dab a bit of the melted chocolate onto the point of the Hershey’s kiss. Place a red candy on the tip of the nose.
STEP ELEVEN: Allow the chocolate to set and harden. Gently peel the “mice” off of the parchment paper to eat.
PRO TIP: If you want to speed up the hardening process, you can pop the mice in the freezer for a few minutes.
How to Serve Chocolate Cherry Mice
These sweet, edible Chocolate Cherry Mice are one of the cutest and easiest treats to make! Add these chocolate-covered cherry mice to a platter full of enchanting character treats at a holiday potluck or party. These little guys would also be a great idea for a cupcake or cake topper if you wanted to make them extra delightful. Of course, this fun treat doesn’t have to just be for Christmas! You can make these chocolate cherry mice anytime, just because!
Storage
ON THE COUNTER: Store leftover chocolate mice in an airtight container on the counter at room temperature for up to 5 days.
Chocolate cherry mice candies are whimsical little characters that family and friends of all ages will enjoy. With candy and nut accents, kids and adults will have a blast making these fun creatures and then gobbling them up. You only need a few ingredients and a little creativity to make this charming treat that would be perfect for adorning a dessert table at a holiday party.
FREQUENTLY ASKED QUESTIONS
What type of candies can I use for the nose and eyes?
For the nose, any small red candy would work. Spicy cinnamon hearts or similar candy would be a fun choice. For the eyes, you can either use icing to pipe tiny dots or mini chocolate chips would also work.
Do the cherries have to have the stems?
Because you need the stems for the tails, it is best to find maraschino cherries that still have the stems on. If you absolutely cannot find ones with stems, you could perhaps use a licorice lace for the tail.
Do these candy mice need to be kept in the fridge?
These fun chocolate cherry Christmas mice can be stored in an airtight container on the counter and do not need to be stored in the refrigerator.
MORE RECIPES YOU’LL LOVE
Chocolate Cherry Mice
Chocolate cherry mice candies are whimsical little creatures made with candy and nuts. Kids of all ages will have a blast making and eating these chocolate mice.
Ingredients
- 1 cup milk chocolate chips
- 1 teaspoon shortening
- 20 maraschino cherries with stems
- 20 Hershey’s kisses
- sliced almonds have more than enough for matching sizes and because they break easily
- black icing writer
- small red candies such as dragees or cinnamon candies
Instructions
- Place chocolate chips and shortening in a small microwave-safe mixing bowl.
- Heat in 30-second increments, stirring between each, until chips are mostly melted.
- Stop heating and continue stirring until the mixture is fully melted and smooth.
- Spread a sheet of parchment paper on your work surface.
- Hold a maraschino cherry gently by its stem. Be sure any excess cherry juice has been removed, or dab the cherry onto a paper towel. Dip the cherry down into the chocolate mixture to coat well. Lift out and place on the parchment paper. You can adjust how you set the cherry to determine how the “tail” of the “mouse” will set.
- Place a Hershey’s kiss with the flat side leaned onto the chocolate-dipped cherry to form the mouse’s head.
- Repeat these steps for about half of the cherries. This will allow the chocolate to set up just a bit before adding the other face components.
- Identify slivered almonds that are similar in size for each mouse’s ears. Break the narrower end’s tip off of each ear. Wedge the “ears” between Hershey's kiss and the cherry.
- Use a small hole in the icing writer and dot two eyes onto the mouse’s head.
- With a toothpick, dab a bit of the melted chocolate onto the point of the Hershey’s kiss. Place a red candy on the tip of the nose.
- Allow the chocolate to set and harden. Gently peel the “mice” off of the parchment paper to eat.
Notes
PRO TIP: Reheat the chocolate for 15 seconds at a time if it begins to thicken too much for dipping.
PRO TIP: Apart from dipping the cherries, the chocolate actually works best if it’s cooled and thickened. Allow the chocolate to cool before trying to place the ears or nose.
PRO TIP: If you want to speed up the hardening process, you can pop the mice in the freezer for a few minutes.


Comments
Rosemarie Houser says
The little mice are so cute.