Published on
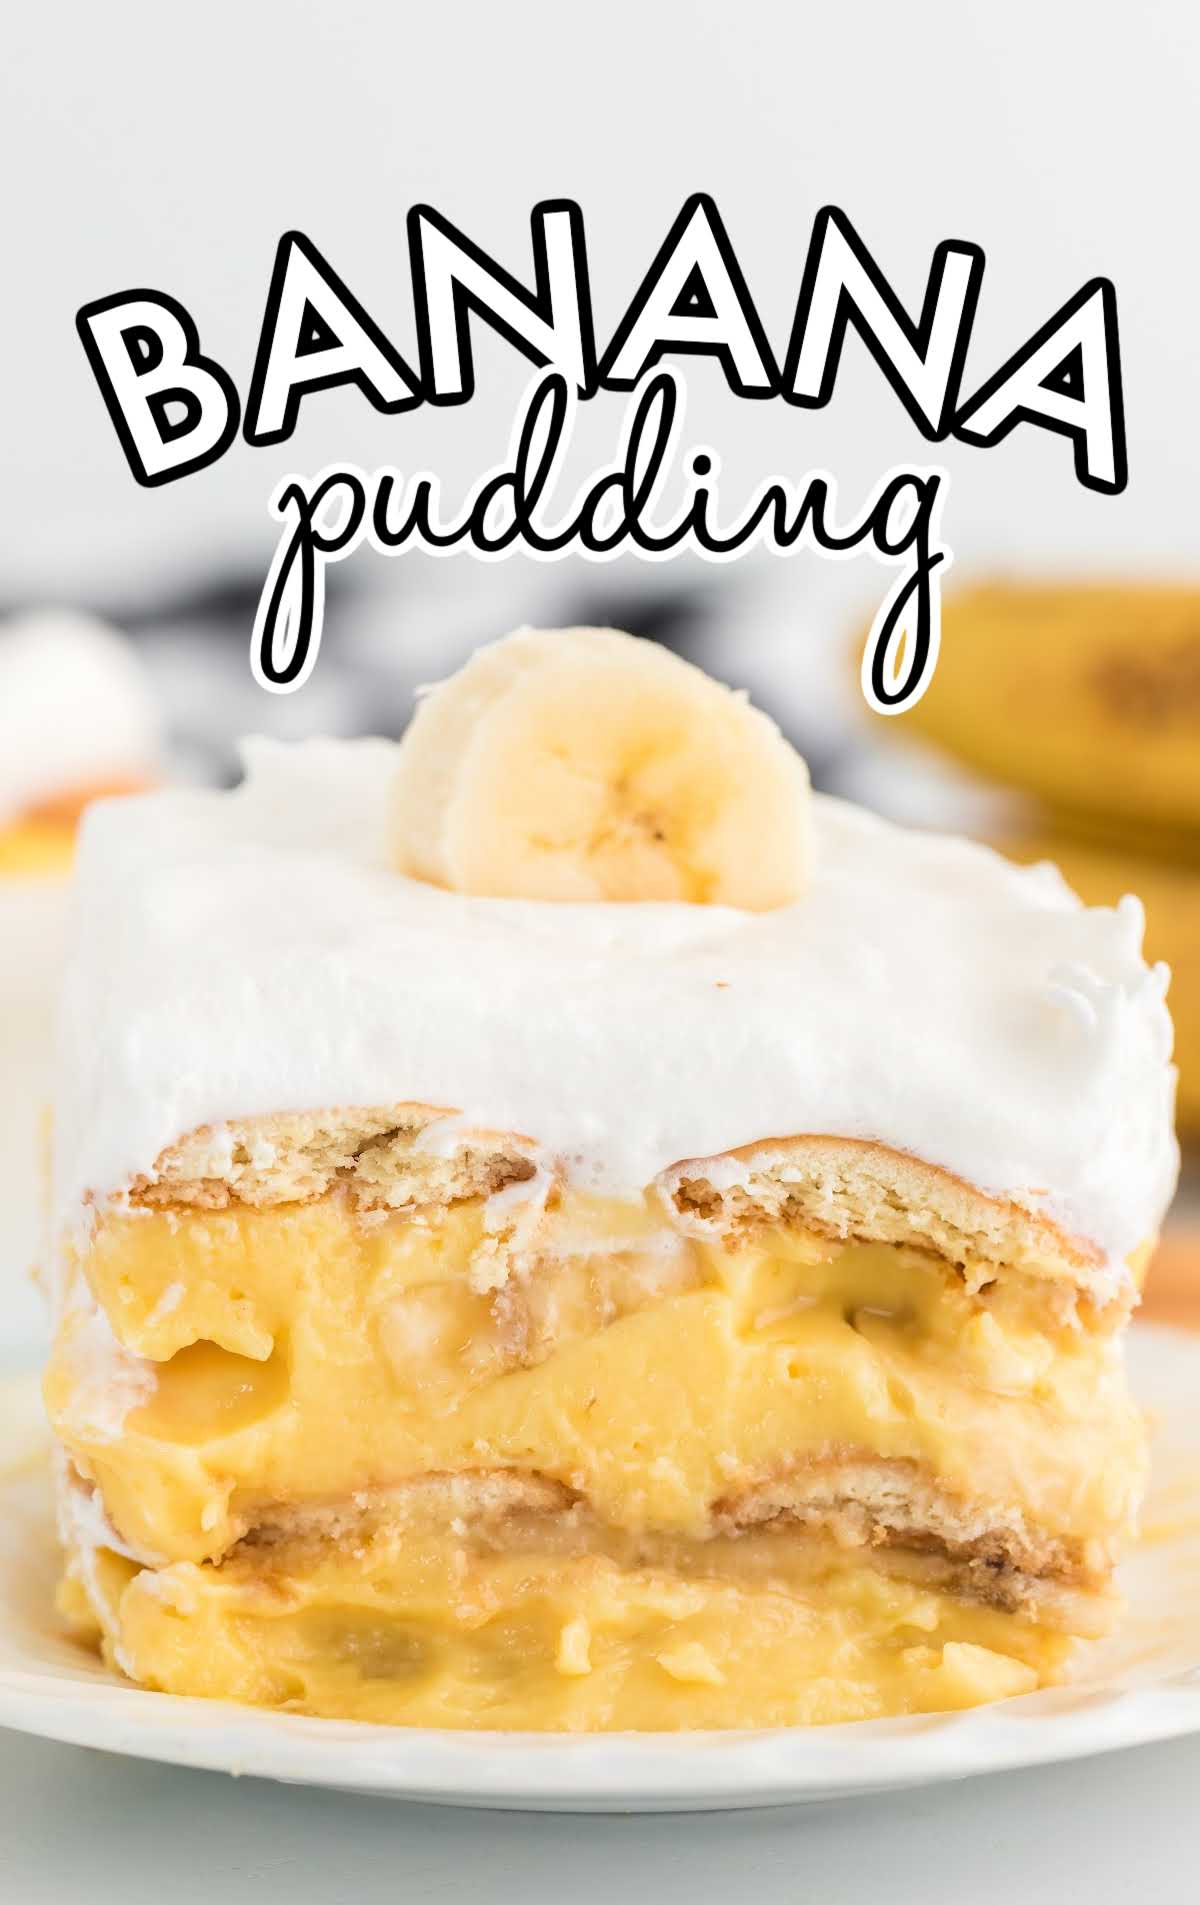
Banana Pudding

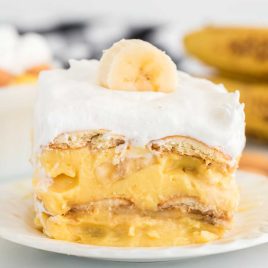
Banana pudding is a luscious no-bake layered dessert made with vanilla pudding, fresh bananas, curvy vanilla wafers, and topped with Cool Whip.
Jump to RecipeTable of Contents
Banana pudding is the ultimate Southern dessert that is simple to layer together with only a few ingredients. Easy and no-bake, this homemade banana pudding recipe is made with layers of sweet creamy pudding, fresh bananas, and vanilla wafers, and then topped with Cool Whip. Your whole family will love this old-fashioned favorite!
Looking for more delicious banana pudding desserts? Banana Pudding Pie, Banana Pudding Cake, and Banana Pudding Fluff are three more desserts you’ll want to try.
Banana Pudding Ingredients
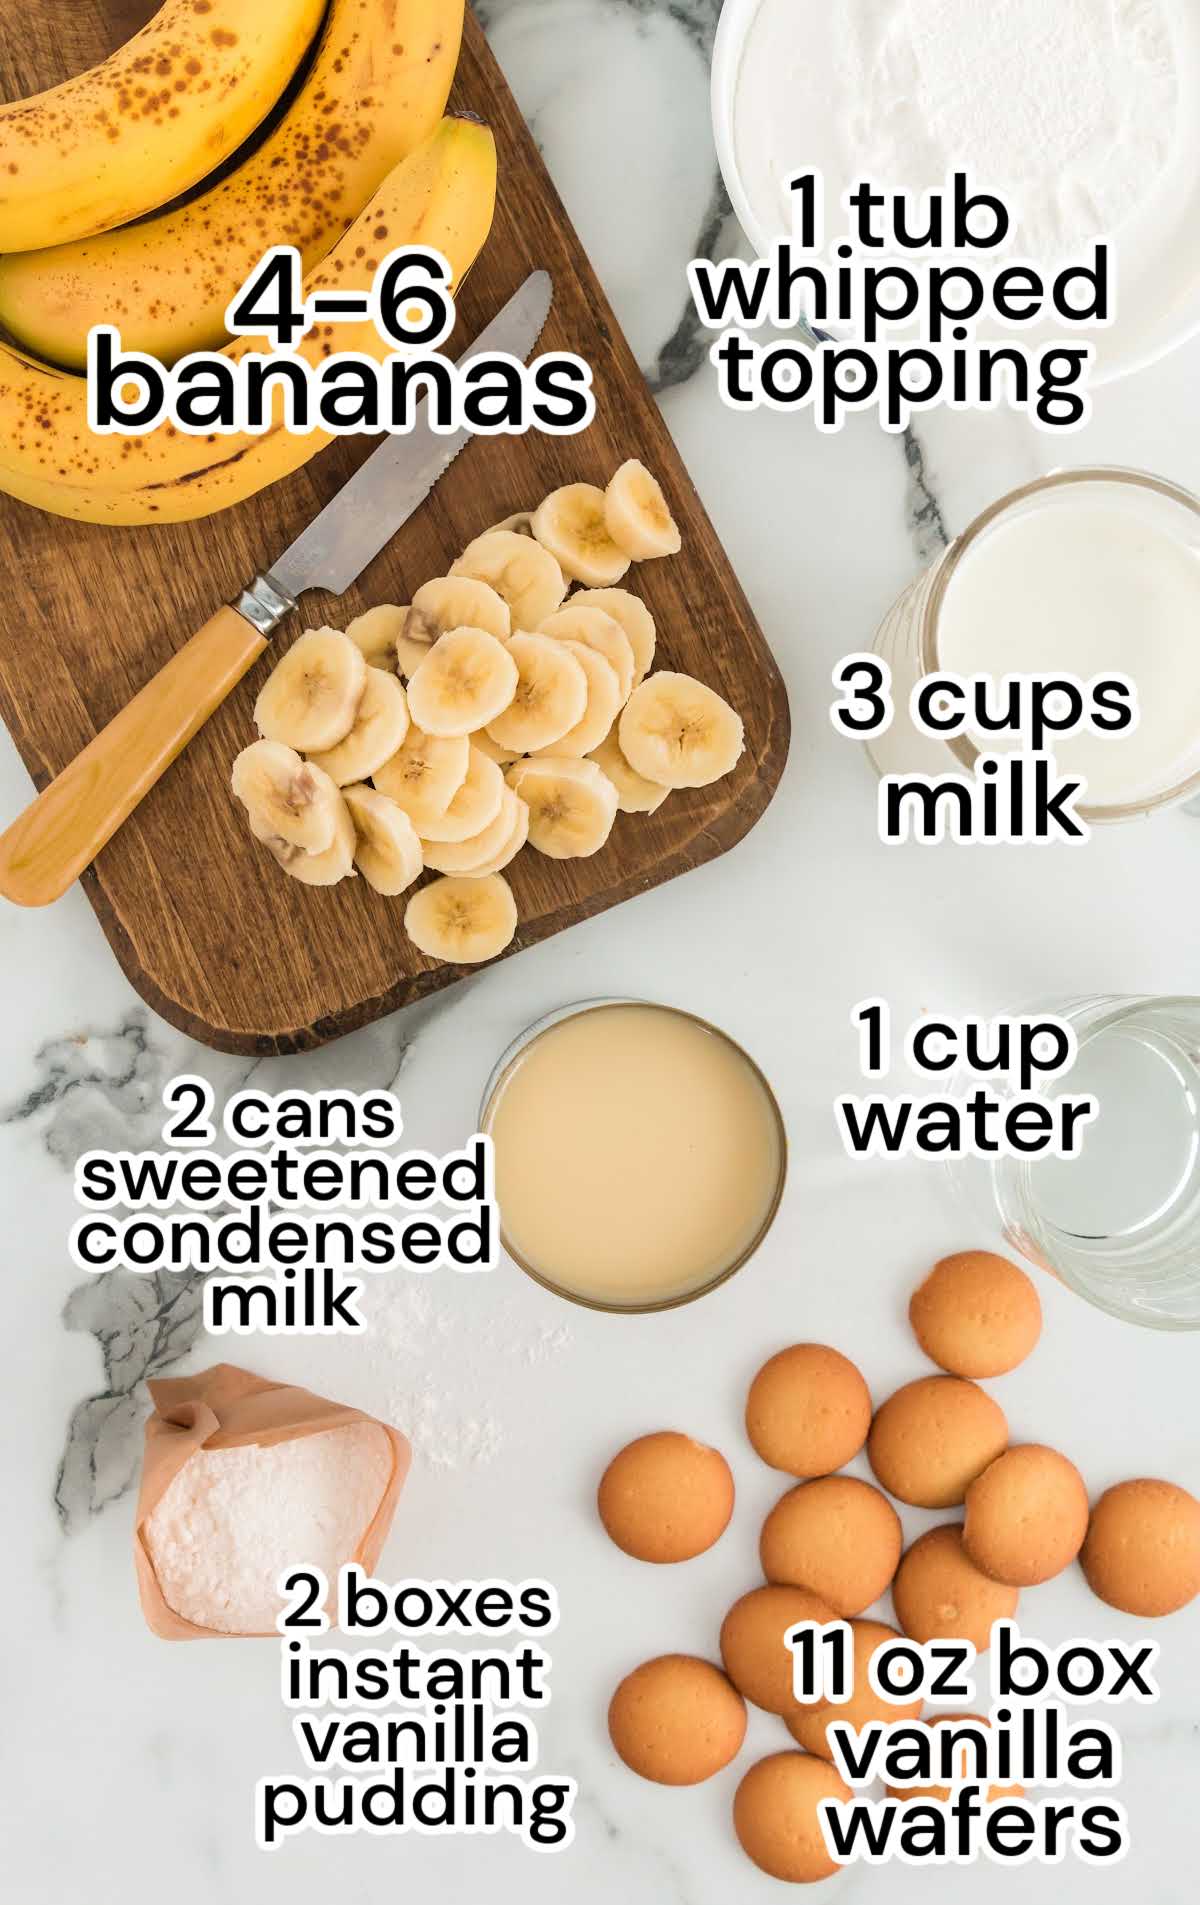
You will need:
- 28 ounces sweetened condensed milk
- 3 cups milk
- 1 cup water
- 10.2 ounces instant vanilla pudding
- 4 to 6 bananas
- 11 ounces vanilla wafers
- 8 ounces Cool Whip
Substitutions and Additions
PUDDING: You could also make this with an instant banana pudding mix for an even more intense banana flavor. Instant cheesecake pudding or French vanilla pudding are other favorites for us!
COOL WHIP: This banana pudding recipe calls for Cool Whip but you can also use our homemade whipped cream on top of your delicious dessert instead of Cool Whip.
How to Make Banana Pudding
PRO TIP: You’ll want to make sure you’re starting with firm, just-ripe bananas. If you get bananas that are too ripe, they’re likely to brown much quicker.
You can treat the bananas with a spritz of lemon juice or lime juice. To avoid changing the flavor, you won’t want to use a ton of citrus juice — just a quick brush to each side or spritz from a spray bottle.
STEP ONE: In a medium-sized bowl, whisk together the sweetened condensed milk with the water and milk.
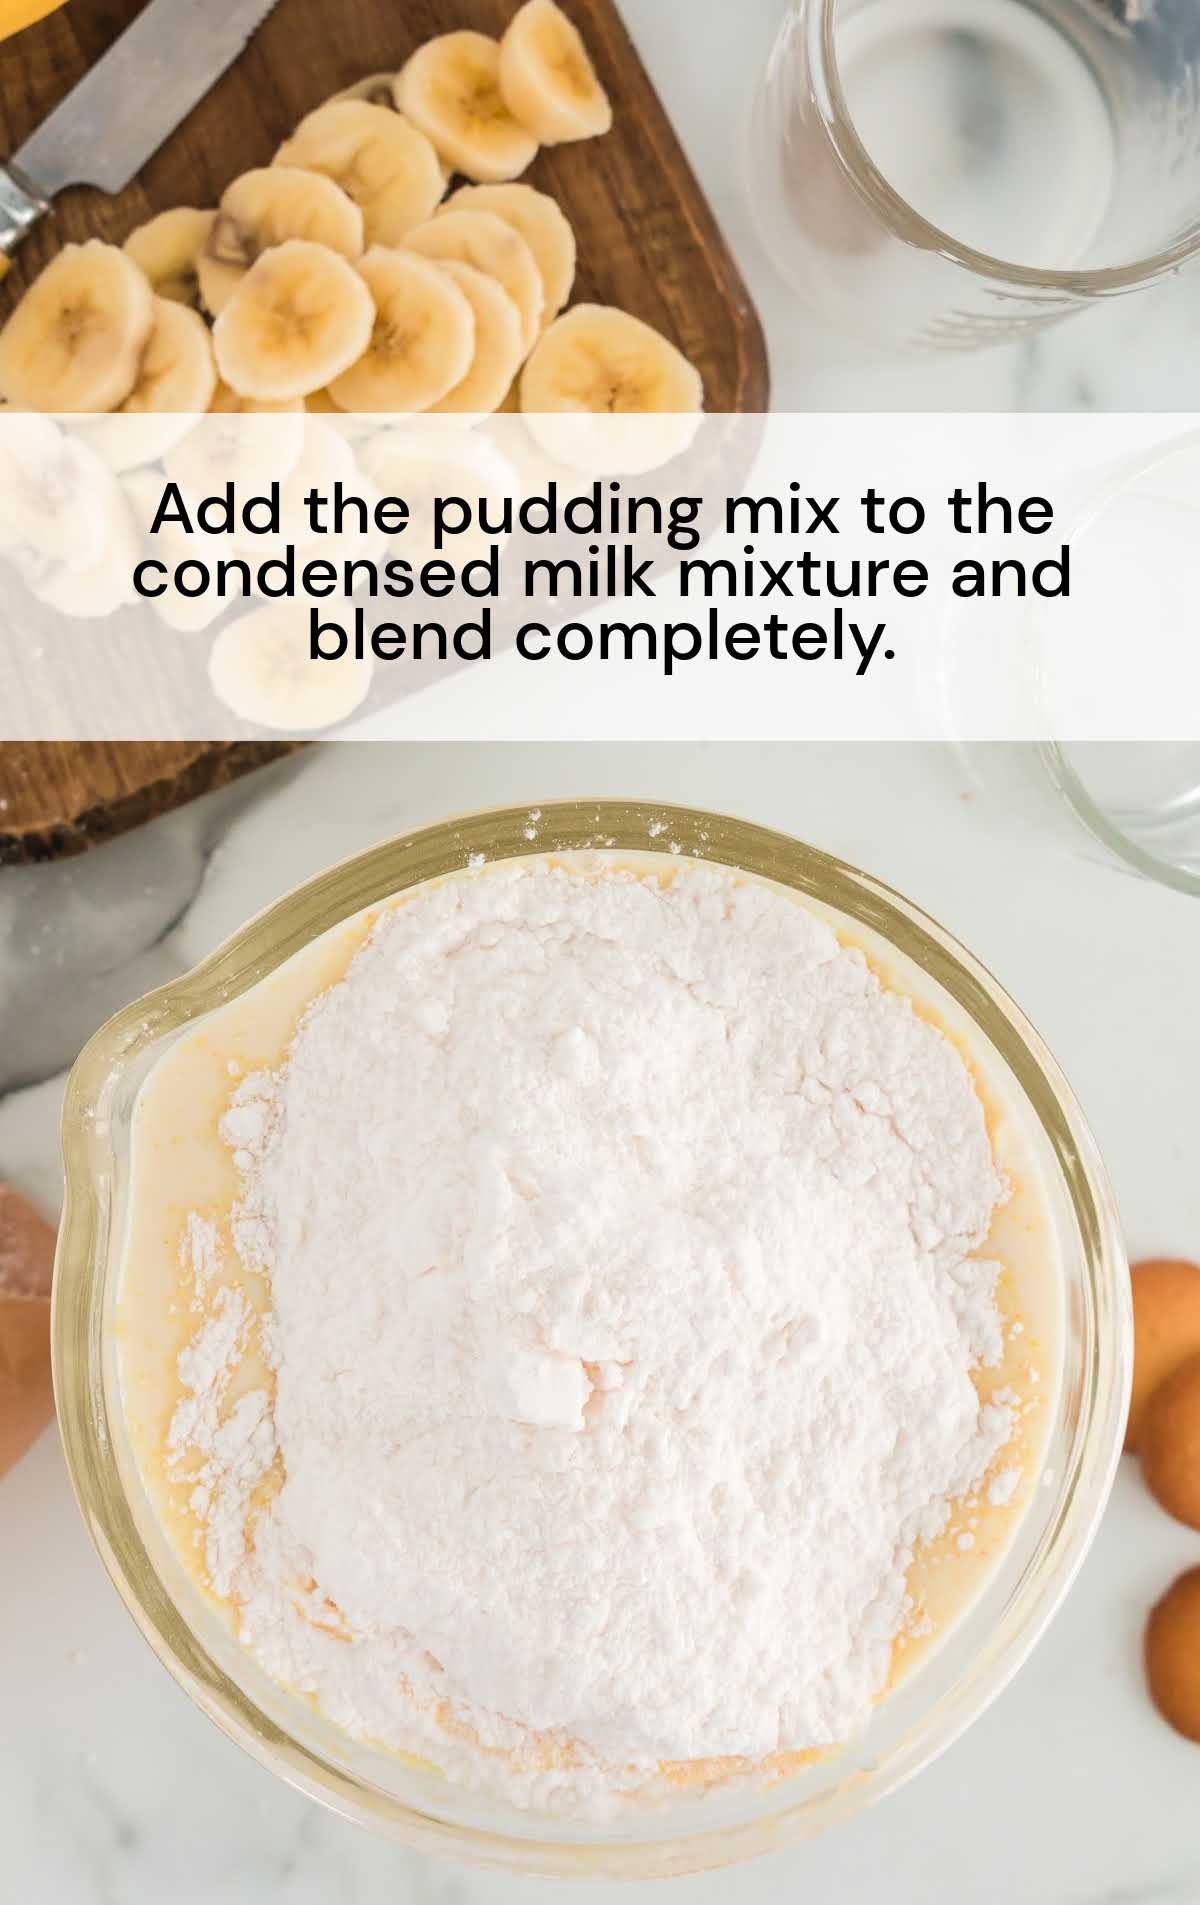
STEP TWO: Stir in the instant vanilla pudding and blend well.
STEP THREE: Line the bottom of an 8×8 casserole dish with one layer of vanilla wafers.
STEP FOUR: Thinly slice your bananas and add a layer of bananas over the wafers.
PRO TIP: Slice your bananas just before you use them. The longer they’re exposed to air, the more likely they are to turn brown. The layers of pudding also help them stay out of the air and maintain their color.
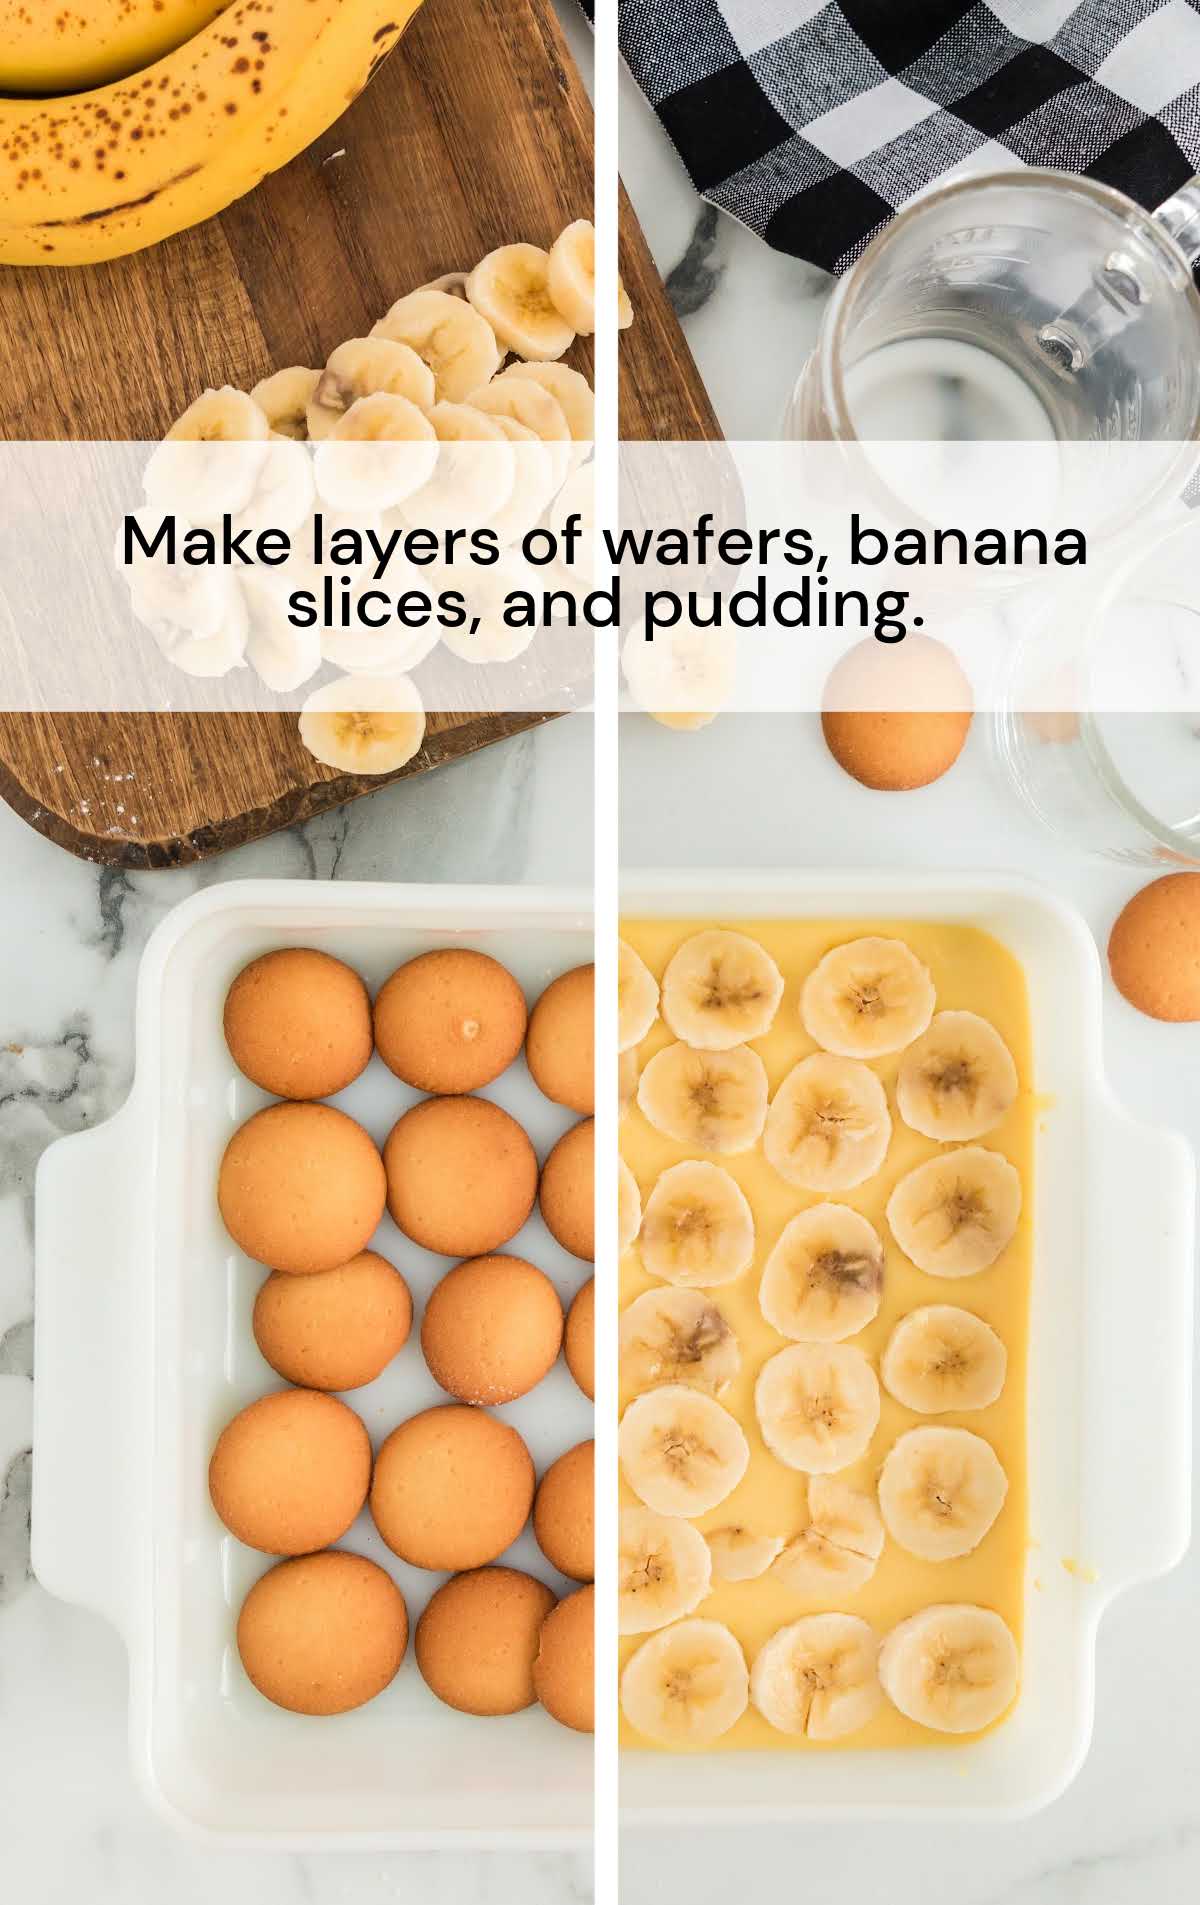
STEP FIVE: Give your pudding a quick stir and pour a layer of pudding over the bananas.
STEP SIX: Repeat the layers using wafers, bananas, and pudding until you have filled your dish, making the top layer a layer of vanilla wafers.
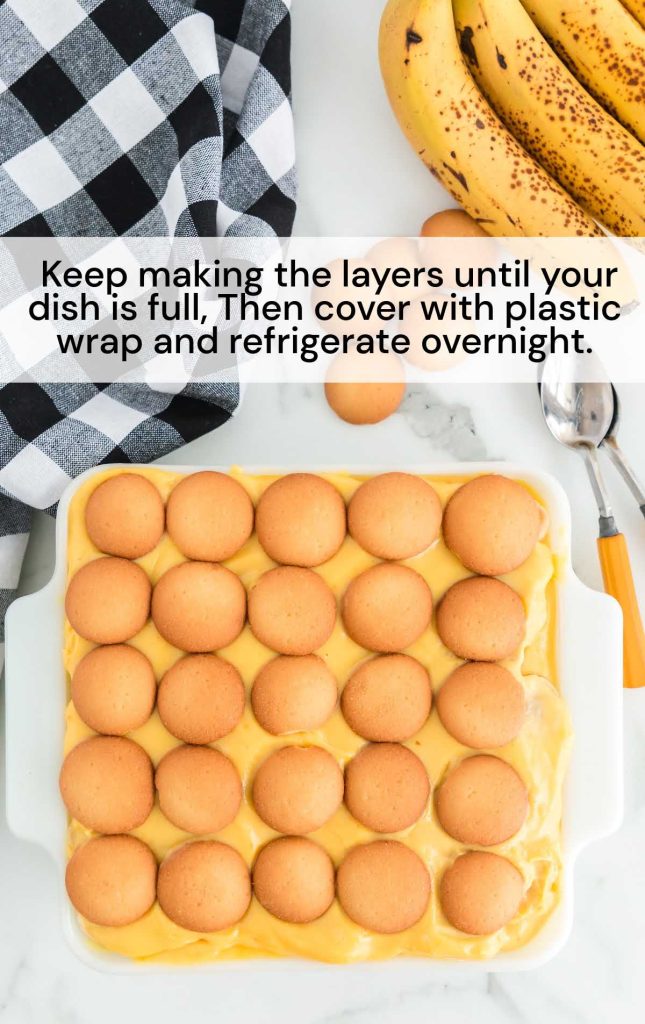
STEP SEVEN: Cover the dish with plastic wrap and refrigerate overnight to allow the vanilla wafers to soften.
PRO TIP: It is best to make this classic dessert a day in advance as it will allow time for all of the flavors to mingle, and the wafers will have softened just the right amount by the next day.
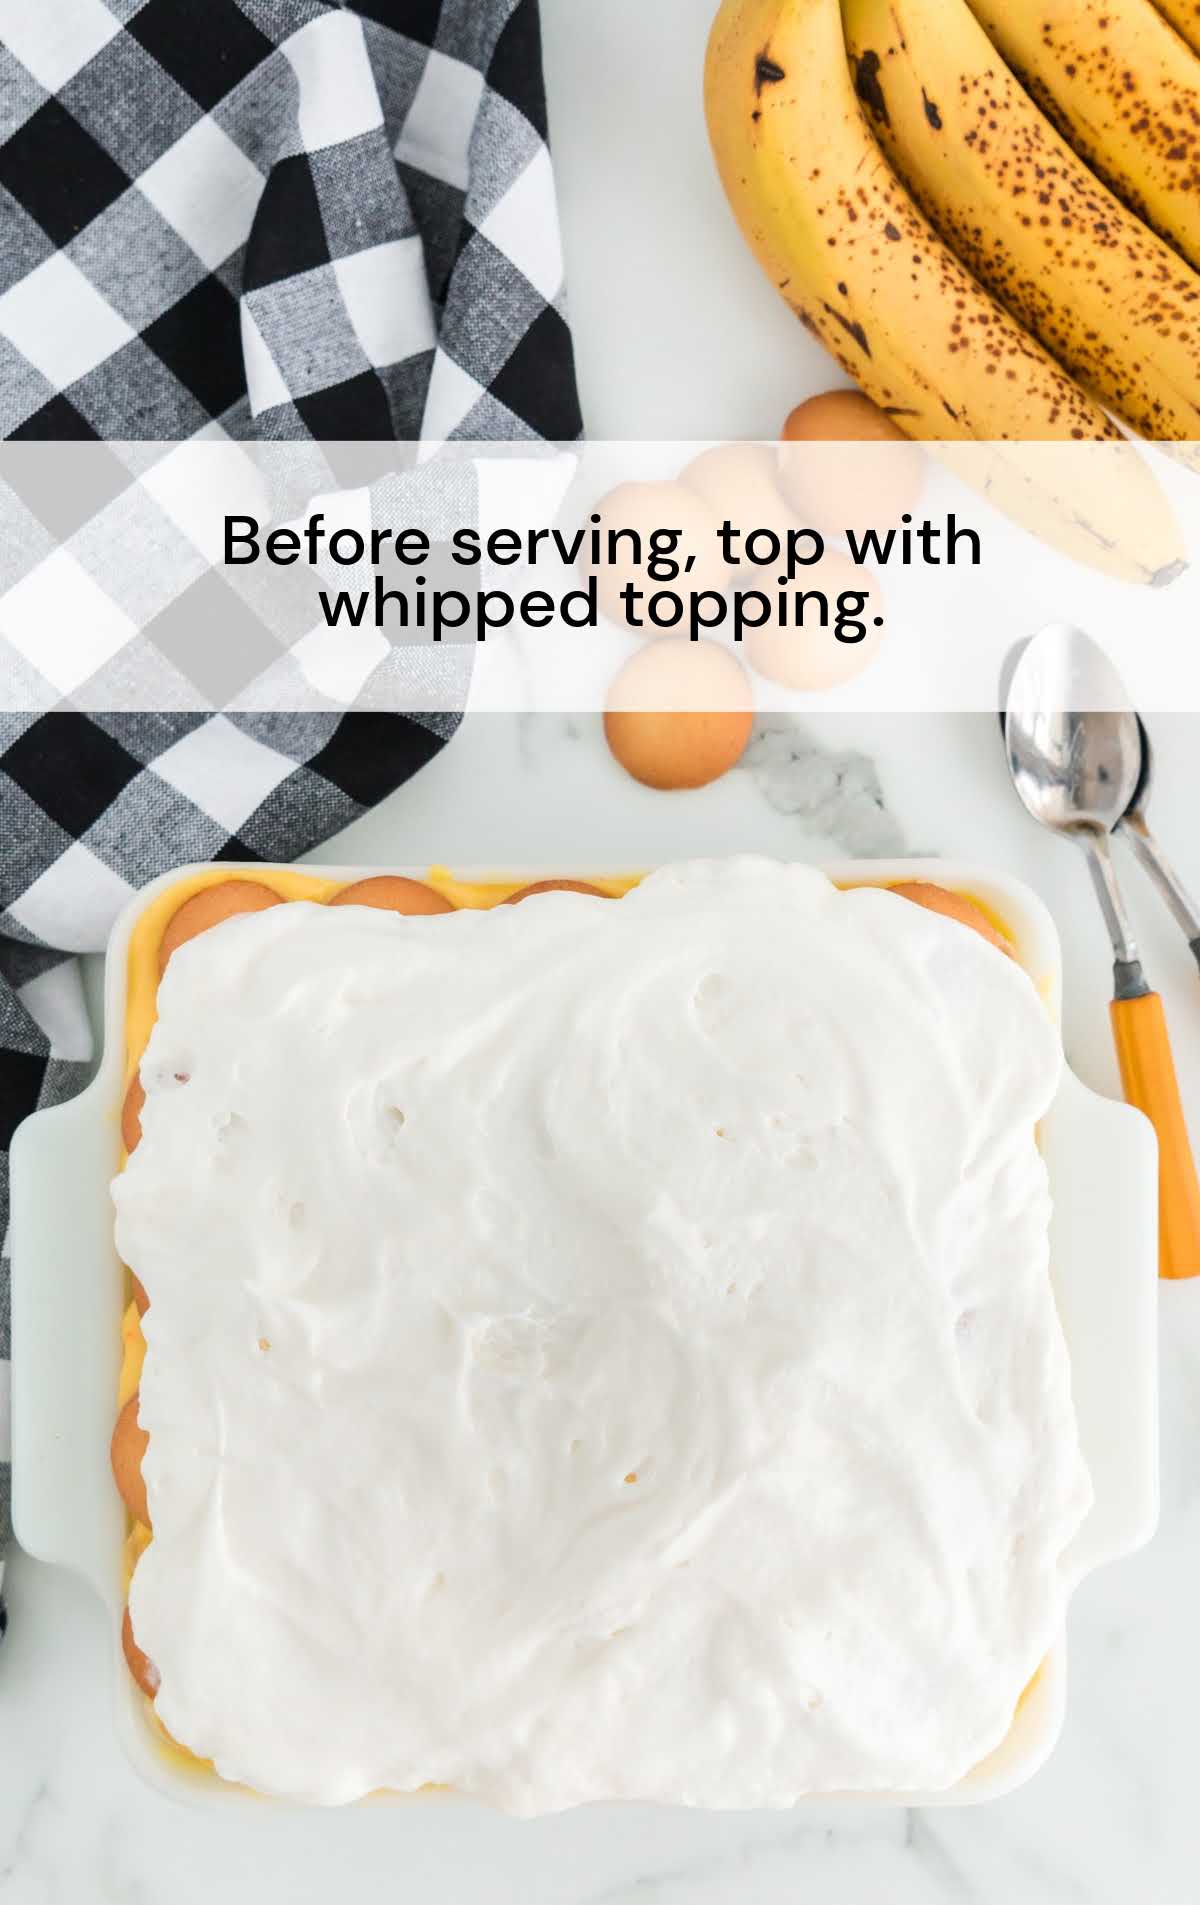
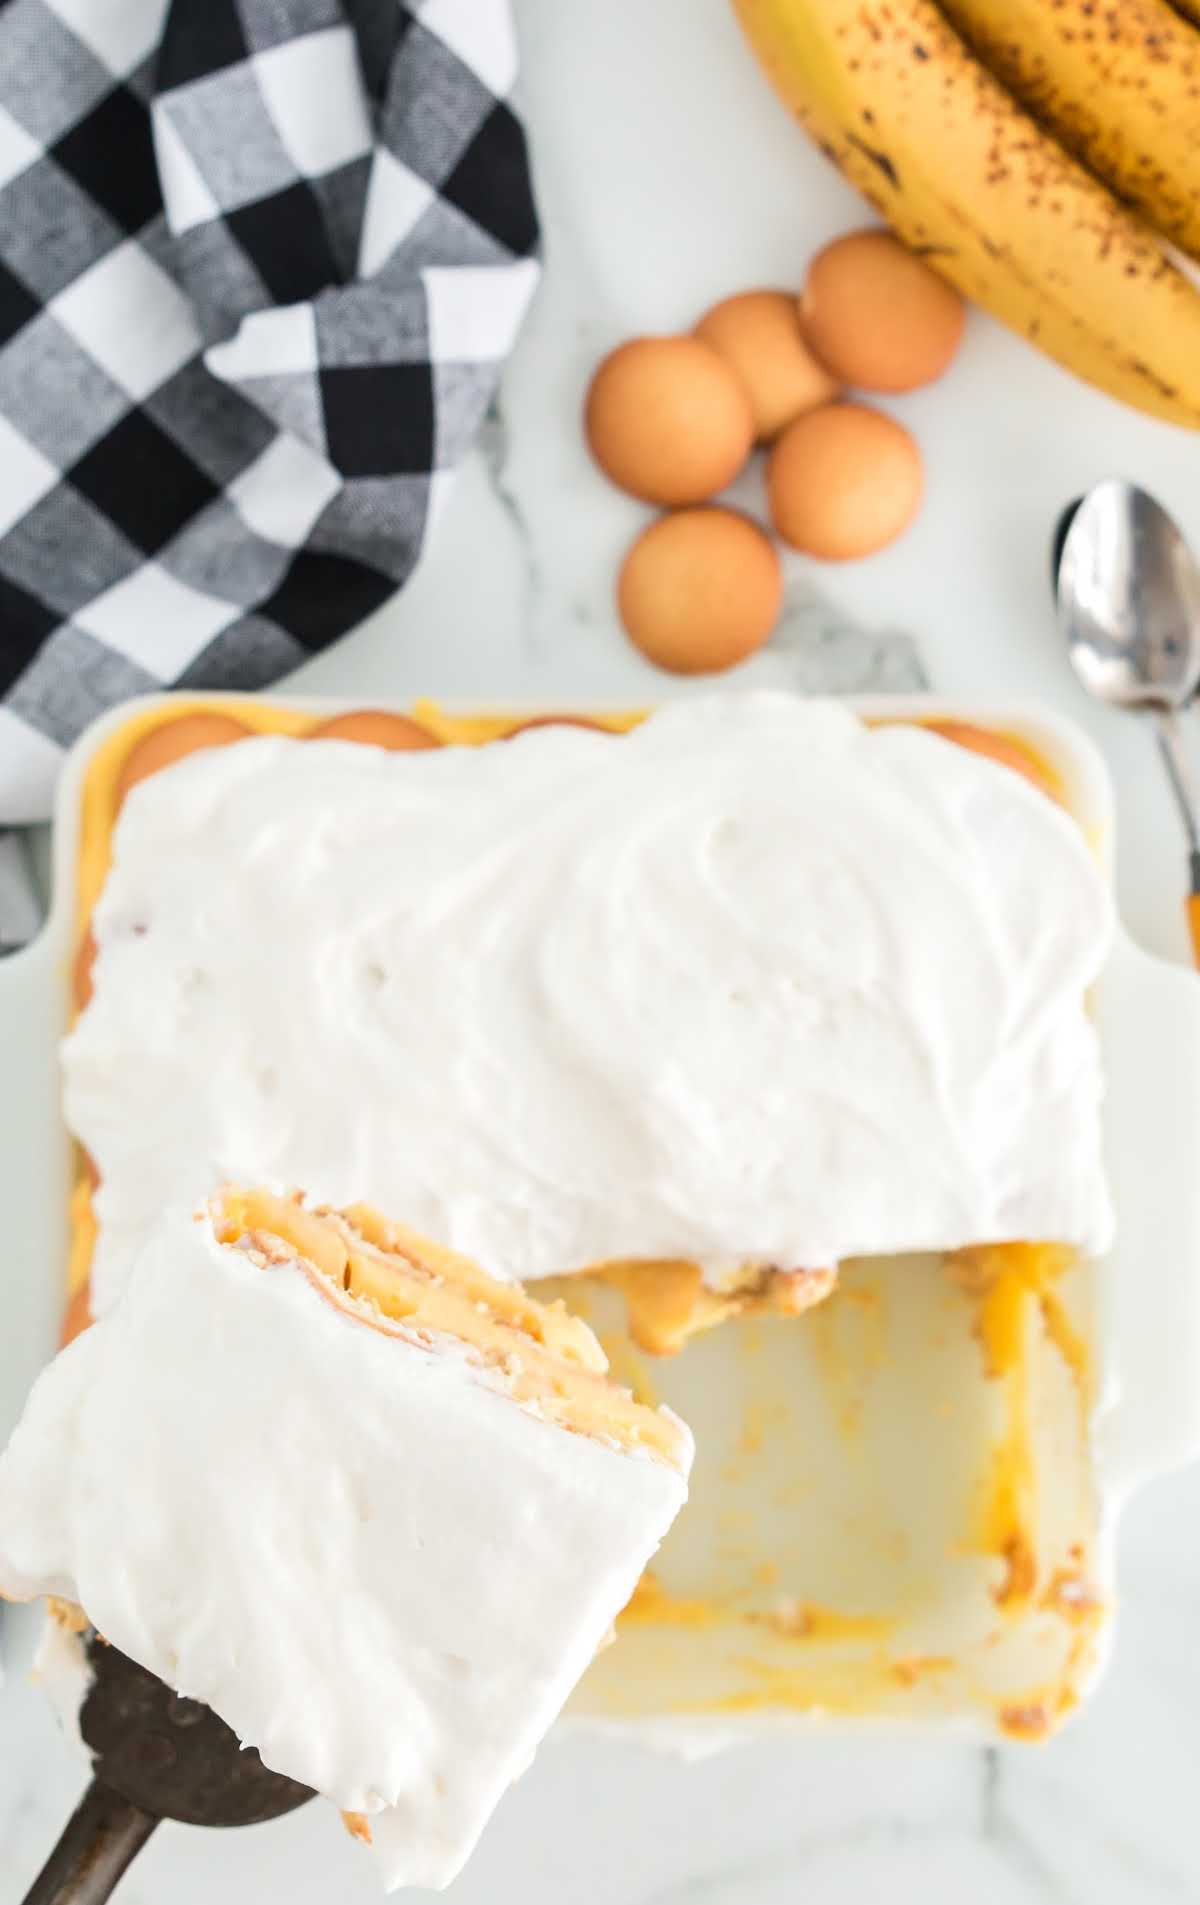
STEP EIGHT: Top with Cool Whip before serving and garnish with extra banana slices or wafers.
How to Serve Banana Pudding
Banana pudding looks stunning served in a trifle bowl, but it tastes equally delicious if you make it in a casserole dish. Simple to make, banana pudding travels well and is perfect for weeknights, potlucks, and family dinners. You can also make this easy recipe ahead of time! To make it even more indulgent, serve your banana pudding with a scoop of creamy vanilla ice cream on the side.
Storage
IN THE FRIDGE: Store your banana pudding in the fridge covered in plastic wrap for up to 3 to 4 days.
IN THE FREEZER: It’s not recommended to freeze your banana pudding because the bananas won’t hold up well in the freezer, and thawing it can make the texture soggy.
Banana pudding is a luscious no-bake layered dessert. Creamy and rich, this easy old fashioned banana pudding is bound to become one of your favorite desserts to make and eat. Easy to serve to friends and family, you may be tempted to sit and eat the entire pan by yourself!
FREQUENTLY ASKED QUESTIONS
How long will the banana pudding keep in the fridge?
This no-bake banana pudding will keep in the fridge for up to four days. The only thing you will want to keep in mind is that the bananas will start to turn brown unless you spray them with lemon juice before layering them in the dish.
What can I use if I can’t find vanilla wafers?
Butter or shortbread cookies are probably the closest you can get to vanilla wafers if you can’t find them in the store. They would taste just as delicious in this southern banana pudding.
How to keep bananas from turning brown in banana pudding?
To keep your bananas from turning brown, spritz them with a bit of lemon or lime juice.
How long does a banana pudding have to sit before you eat it?
We recommend waiting at least two hours to allow the banana pudding to set before enjoying it.
How is pudding made from scratch?
To make pudding from scratch, ingredients such as milk, sugar, salt, and cornstarch are whisked together over heat. Once heated, the mixture is removed from the heat and the egg yolks are slowly incorporated into the mixture. Once thickened, the mixture can be served warm or allowed to cool first.
MORE RECIPES YOU’LL LOVE
Banana Pudding
Banana pudding is a luscious no-bake layered dessert made with vanilla pudding, fresh bananas, curvy vanilla wafers, and topped with Cool Whip.
Ingredients
- 28 ounces sweetened condensed milk
- 3 cups milk
- 1 cup water
- 10.2 ounces instant vanilla pudding
- 4 to 6 bananas
- 11 ounces vanilla wafers
- 8 ounces Cool Whip
Instructions
- In a medium-sized bowl, whisk together the sweetened condensed milk with the water and milk.
- Stir in the instant vanilla pudding and blend well.
- Line the bottom of an 8×8 casserole dish with one layer of vanilla wafers.
- Thinly slice your bananas and add a layer of bananas over the wafers.
- Give your pudding a quick stir and pour a layer of pudding over the bananas.
- Repeat the layers using wafers, bananas, and pudding until you have filled your dish, making the top layer a layer of vanilla wafers.
- Cover the dish with plastic wrap and refrigerate overnight to allow the vanilla wafers to soften.
- Top with Cool Whip before serving and garnish with extra banana slices or wafers.
Notes
You’ll want to make sure you’re starting with firm, just-ripe bananas. If you get bananas that are too ripe, they’re likely to brown much quicker.
You can treat the bananas with a spritz of lemon juice or lime juice. To avoid changing the flavor, you won’t want to use a ton of citrus juice — just a quick brush to each side or spritz from a spray bottle.
Slice your bananas just before you use them. The longer they’re exposed to air, the more likely they are to turn brown. The layers of pudding also help them stay out of the air and maintain their color.
It is best to make this classic dessert a day in advance as it will allow time for all of the flavors to mingle, and the wafers will have softened just the right amount by the next day.


Leave a Comment