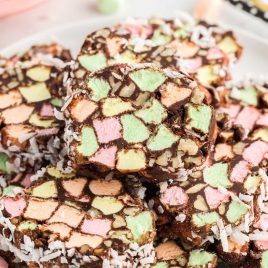
Church Window Cookies
Church Window Cookies are a no-bake treat made with a combination of colorful marshmallows, chocolate, walnuts, and coconut that looks like stained glass windows.
Ingredients
- 1½ cup sweetened shredded coconut divided ½ cup, ½ cup, ¼ cup, and ¼ cup
- 12 ounces semi-sweet chocolate chips or 2 cups
- ½ cup salted sweet cream butter softened
- 1 teaspoon pure vanilla extract
- 1 cup toasted walnuts finely chopped
- 10 ounces mini fruit marshmallows
Instructions
- Line 2 baking sheets with wax paper. Leaving a 1-inch gap, sprinkle ½ cup of the shredded coconut in a strip measuring 3 inches x 10 inches. Repeat for the second lined baking sheet. Set them aside.
- Using a 3 to 4 quart heavy-bottomed saucepan over medium heat, add the chocolate chips and butter. Stir often until all the chips are melted. Remove the pan from the heat, stir in the vanilla extract, and allow the chocolate to cool slightly.
- Using an extra-large mixing bowl, add the mini marshmallows and chopped walnuts.
- Pour the chocolate over the marshmallows and walnuts.
- Using either a wooden spoon or a silicone spatula, stir until all the marshmallows are completely coated.
- Scoop ½ of the marshmallow mixture on top of the coconut.
- Evenly sprinkle ¼ cup of the shredded coconut on top of the marshmallow mixture.
- Using the 1-inch lip of the wax paper, begin tightly rolling the marshmallow mixture into a log. Tuck in the ends of the paper and repeat the steps for the remaining marshmallow mixture. Chill in the refrigerator for 1 to 2 hours.
- Unroll the coated marshmallow “logs” and slice ½ inch cookies.
Notes
PRO TIP: It’s important to allow the chocolate mixture to cool enough that it won’t melt the marshmallows, but not so cool that it will not spread.
PRO TIP: Spray your spoon with a bit of cooking spray to make it easier to combine the mixture without it sticking to your utensils.
PRO TIP: Make sure not to hurry the chilling stage. Chilling long enough is important to get nice clean slices.